Follow the steps below to install a legacy dash anchor in a Gen1 (2022-2024) Rivian R1T or R1S. See this instruction guide for the current-design dash anchor that works on all years of Rivian R1T and R1S. We're here to help if you have questions or get stuck!
(Legacy) Rivian R1T & R1S Dash Anchor Instruction Guide
Installation Steps ➥
-
![A person uses a screwdriver to install a black plastic phone holder onto a car dashboard near a touch screen display.]()
Step 1
Loosen the screw to release the anchor. It does not need to be fully removed.
-
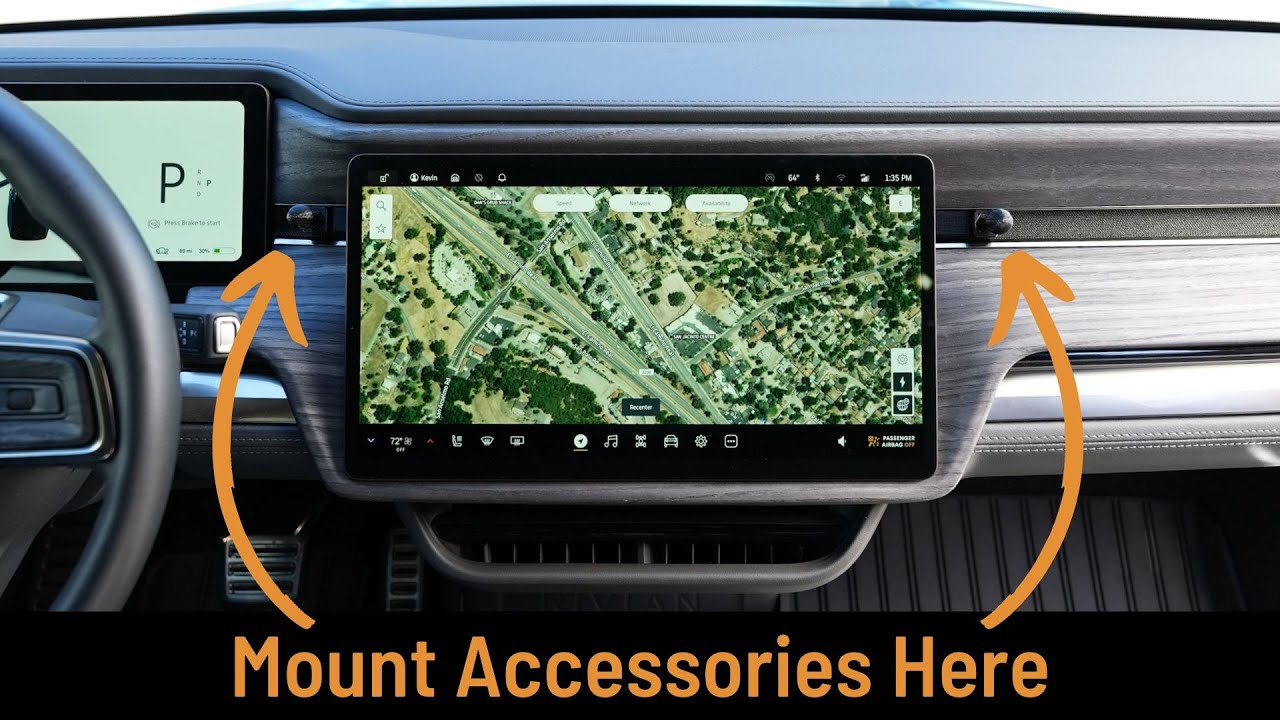
![A close-up of a car dashboard showing two digital screens displaying information. A gear selector lever is visible between the screens.]()
Step 2
On either side of the screen, slide the anchor into the channel until the bump on the anchor is positioned into the second notch behind the screen on the driver's side or the first notch behind the screen on the passenger's side.
The anchor should be tight and stable even without the screw tightened.
Important! If the anchor is not clicking into place, the anchor is either not inserted far enough behind the screen to reach the notch or the two depth adjustment screws need to be loosened so that the bump will make contact with the back of the screen.
Look behind the screen to determine if the bump is in place in the notch. See the Depth Adjustment Instructions tab ☝️ to adjust if needed. -
![Person using a tool to adjust or install a mounting device between two car screens.]()
Step 3
Tighten the screw to expand the anchor and secure it in place.
Note: If the anchor does not feel secure, go back to Step 1 and review the Important! section of Step 2. Contact support if you need help! -
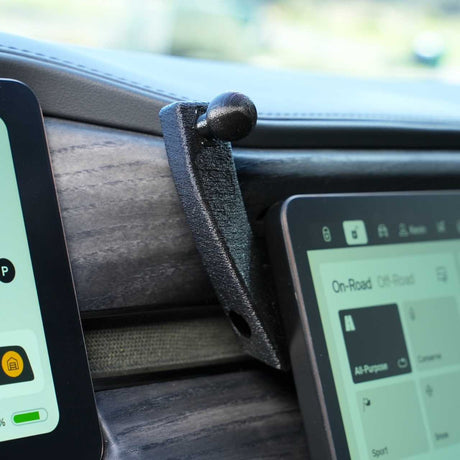
![A person adjusts a rearview mirror mounted on a vehicles dashboard near a touchscreen display.]()
Step 4
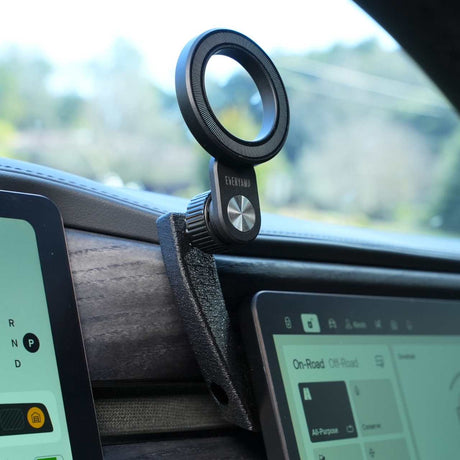
Install your favorite mounts, arms, or other accessories as directed by their instructions.
For the 17mm phone mount pictured, loosen the collar, press the phone mount onto the ball mount, and tighten the collar while holding the phone mount in the desired position.
Important! Some magnetic phone mounts include an adhesive metal ring that can be attached to devices that don't natively work with magnetic mounts. Install the ring on your device or remove it from the mount so that it doesn't affect the strength of the phone connection to the mount. -
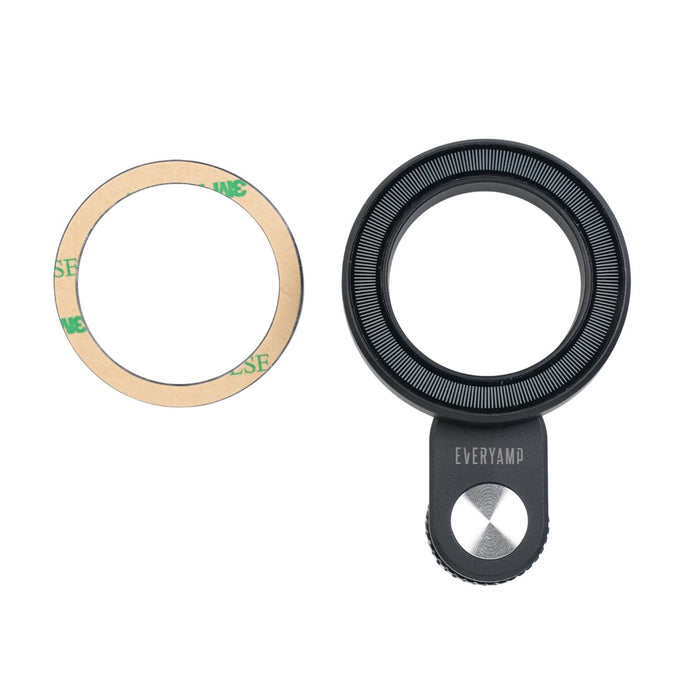
![A black camera lens attachment with a small grip and a separate adhesive ring on a plain background.]()
Step 5 (Optional)
Note: EveryAmp magnet mounts include an adhesive metal ring that can be installed on a device or case that is not compatible with MagSafe mounts.
Important! Do not use the metal ring between the mount and a MagSafe device or it will significantly reduce the strength of the magnets!


Depth Adjustment Instructions Steps ➥
-
![Two identical black plastic firearm charging handles with ball-end levers and angular designs, shown from side and bottom views.]()
Step 1
If you're 100% sure that the bump on the anchor is properly positioned in the notch behind the screen, but the anchor still feels loose, the depth of the anchor can be adjusted to accommodate a larger than typical space between the screen and dash.
Important! This is rarely needed, so take care not to damage the screen with excessive adjustment or force. -
![Person interacting with a touchscreen interface inside a vehicle, using a specialized tool.]()
Step 2
If it's installed, loosen the screw and remove the anchor from the dash.
-
![Close-up of a black 3D-printed object with a ball-shaped handle and a small screwdriver inserted into it. The text EVERY and a partially visible word are imprinted on the object.]()
Step 3
Loosen (lefty loosey) both of the depth adjustment screws a half turn to increase the depth by 0.4mm.
-
![Close-up of a vehicles interior showing two screens and a manual gear shift knob in a parked position.]()
Step 4
Reinstall and check the fit by looking behind the screen to make sure the bump on the anchor is reaching either the second notch on driver's side or the first notch on passenger's side behind the screen.
Repeat Steps 2-4 as needed to fine tune the fit.
Return to the Installation instructions tab ☝️ when you're ready to continue.


Shop Phone holder and mount
-

![EveryAmp 17mm ball mount installed in a Rivian R1T]()
![EveryAmp MagSafe-compatible magnet mount installed in a Rivian R1T]()
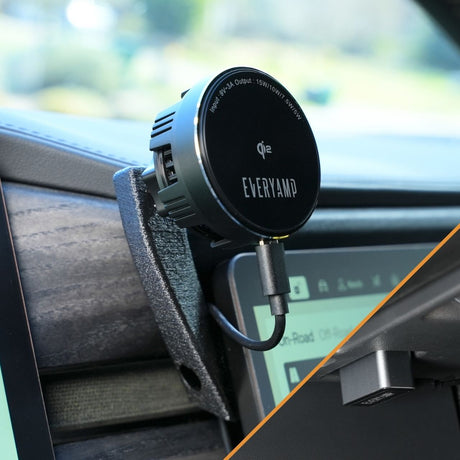
![EveryAmp Qi2 charger and OBD2 power supply installed in a Rivian R1T]()
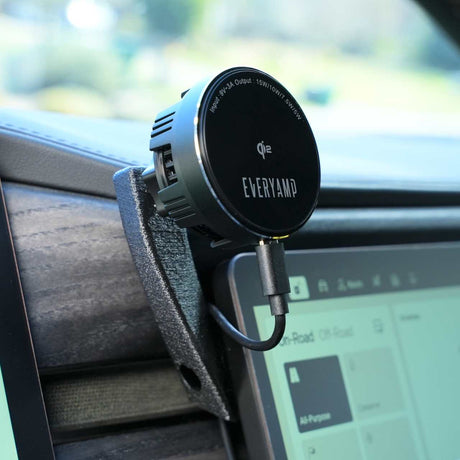
![EveryAmp Qi2 charger installed in a Rivian R1T]()
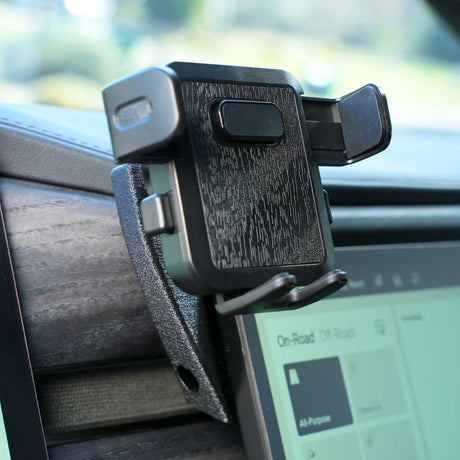
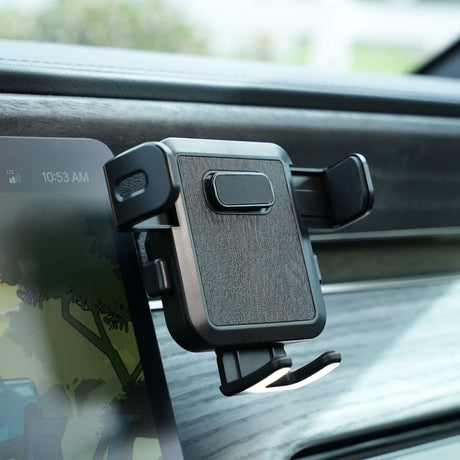
![EveryAmp universal phone mount clamp installed in a Rivian R1T]()
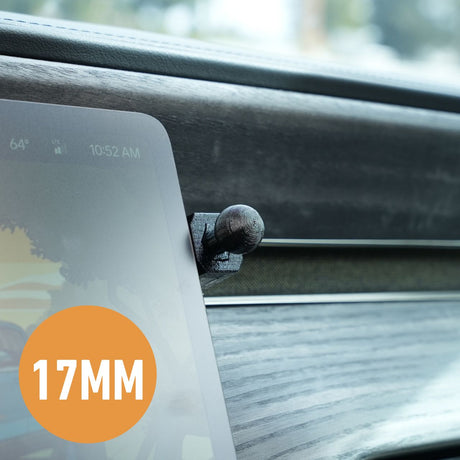
![Close-up of a Phone Mount Dash Anchor by EveryAmp for Rivian R1T/R1S, with a tablet held in place by a 17MM ball mount. The stylish gray interior features wood-like paneling, and the tablet displays time and temperature.]()
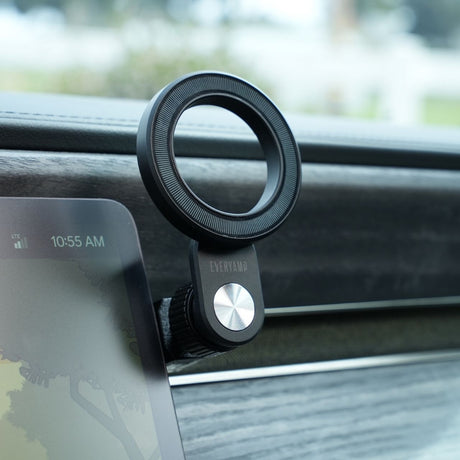
![Close-up of an EveryAmp Phone Mount Dash Anchor for Rivian R1T and R1S, featuring a sleek MagSafe charger with a circular design and metallic center. A digital display beside it shows the time as 10:55 AM.]()
![The EveryAmp Phone Mount Dash Anchor for Rivian R1T and R1S attaches to the car dashboard with adjustable arms and a textured surface, while a MagSafe charger integrates seamlessly next to it, alongside a digital display showcasing a colorful illustration against the wood grain finish.]()
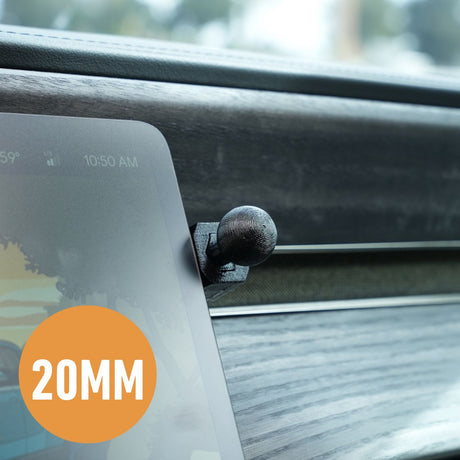
![A close-up shows an EveryAmp Phone Mount Dash Anchor for Rivian R1T and R1S, featuring a black knob holding a screen with colorful graphics on a textured dashboard. An orange 20MM circle hints at the sophisticated design of vehicles like the R1T and R1S.]()
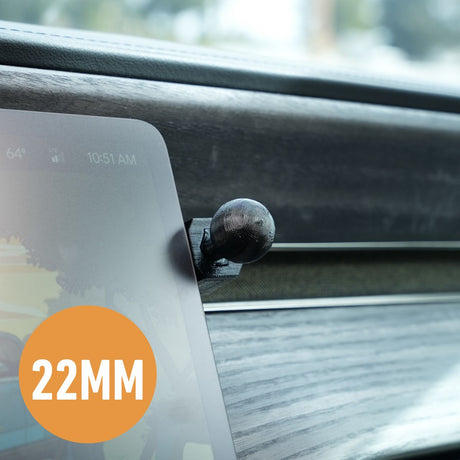
![Close-up of EveryAmps 22mm Phone Mount Dash Anchor for Rivian R1T, elegantly attached to the dashboard. The device screen displays the time (10:51 AM), temperature (64°F), and part of an image, with an orange 22MM circle prominently in view. Wood grain texture adds a touch of sophistication.]()
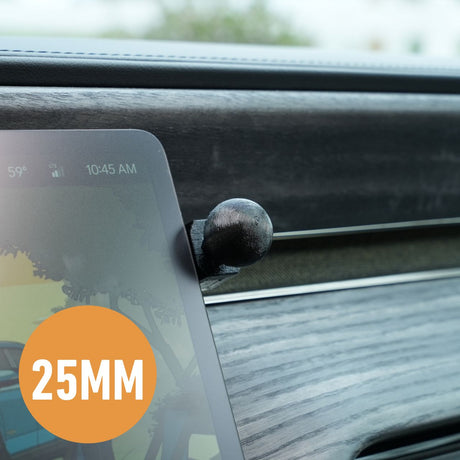
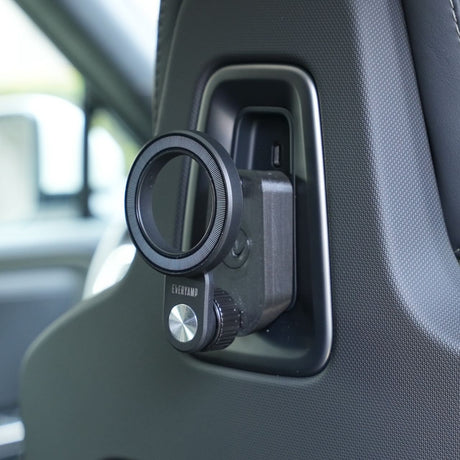
![A close-up of the Rivian R1Ts interior dashboard displays a digital screen with an EveryAmp Phone Mount Dash Anchor, compatible with MagSafe chargers, installed to the right. An orange circle in the bottom left corner reads 25MM, and the temperature and time are displayed.]()
Phone Mount Dash Anchor for Rivian R1T and R1S
Mount 17mm, 20mm, 22mm, or 25mm accessories to the dash.
From$30.00Why it costs less hereWhen you buy direct from the manufacturer, we pay lower fees and pass those savings on to you.
Low price guaranteeIf you find a lower price, show us and we'll match it.
Unit price /Coming Soon -
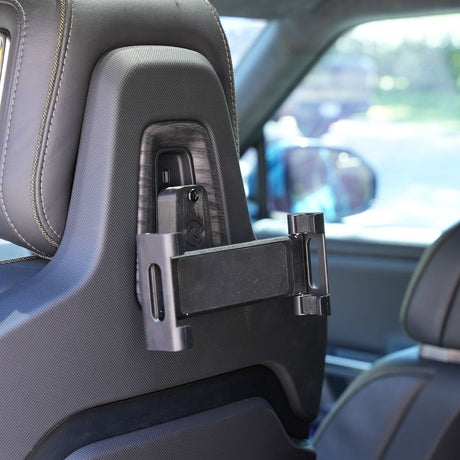
![Close-up of the EveryAmp Back Seat Tablet/Phone Mount Anchor for Rivian R1T, R1S, and R2, featuring a textured surface and adjustable knob, compatible with 17mm and 25mm ball mounts.]()
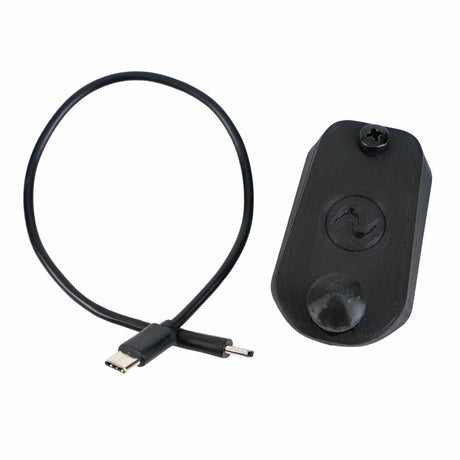
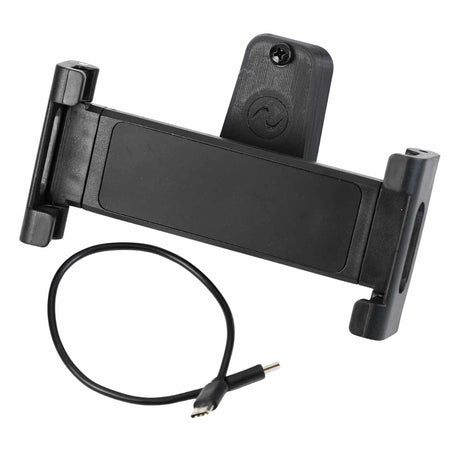
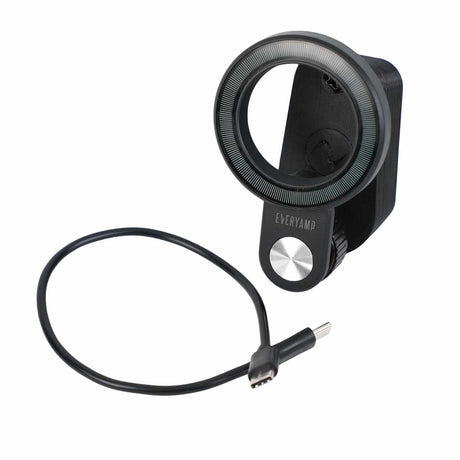
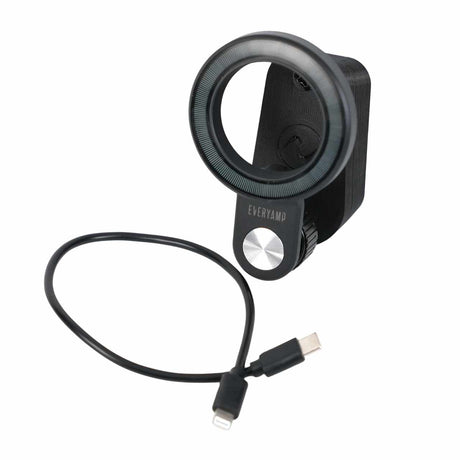
![A black USB-C cable beside the EveryAmp Back Seat Tablet/Phone Mount Anchor for Rivian R1T, R1S, and R2—a compact black device with a logo, screw, and round protrusion. Compatible with 17mm and 25mm ball mounts.]()
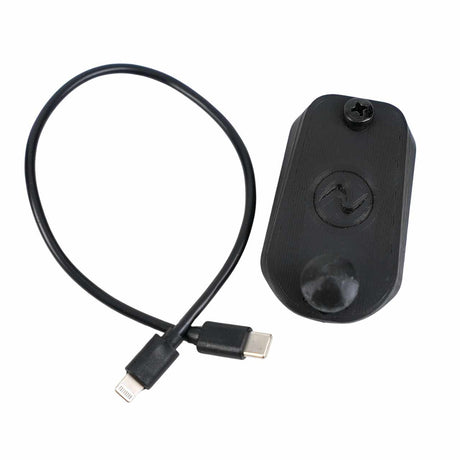
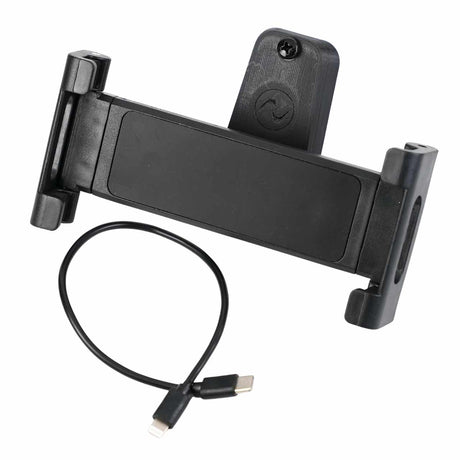
![The EveryAmp Back Seat Tablet/Phone Mount Anchor for Rivian R1T, R1S, and R2 includes a black device with a circular symbol and a USB-C to Lightning cable—compatible with Seat Back Mounts and fits 17mm & 25mm ball mounts.]()
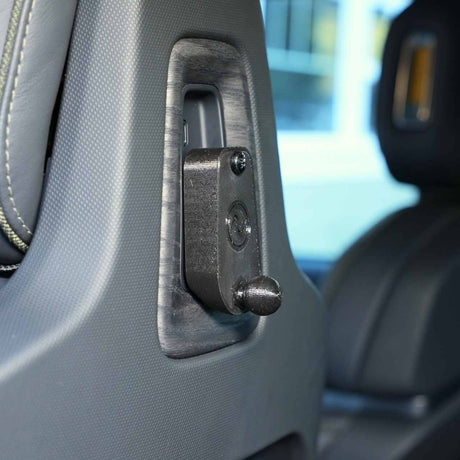
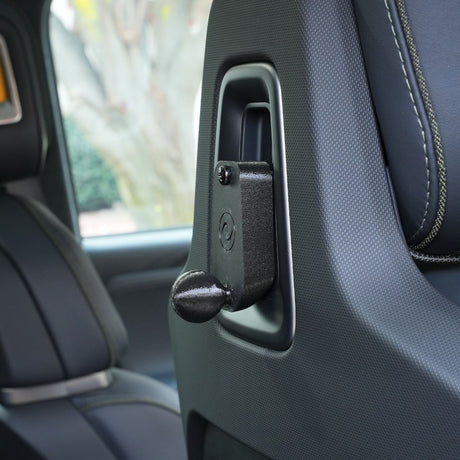
![The EveryAmp Back Seat Tablet/Phone Mount Anchor for Rivian R1T, R1S, and R2 attaches to a car seat headrest, features 17mm/25mm ball mounts, and is designed for secure device mounting inside the vehicle.]()
![The EveryAmp Back Seat Tablet/Phone Mount Anchor for Rivian R1T, R1S, and R2 is a black adjustable holder with a mounting bracket, offers 17mm and 25mm ball mount options, and is compatible with phone or tablet devices. USB-C cable shown detached.]()
![EveryAmp Back Seat Tablet/Phone Mount Anchor for Rivian R1T, R1S, and R2 includes a black adjustable holder with mounting bracket, supports 17mm/25mm ball mounts, plus a USB-C to Lightning charging cable placed underneath.]()
![The EveryAmp Back Seat Tablet/Phone Mount Anchor for Rivian R1T, R1S, and R2 attaches to seat headrests and supports 17mm and 25mm ball mounts for secure device mounting in your Rivian vehicle.]()
![EveryAmp's black Back Seat Tablet/Phone Mount Anchor for Rivian R1T, R1S, and R2 features a circular opening and comes with a USB-C charging cable. It fits 17mm or 25mm ball mounts and is ideal for use as a seat back mount.]()
![The EveryAmp Back Seat Tablet/Phone Mount Anchor for Rivian R1T, R1S, and R2 features a black circular grip and is shown next to a USB-C to Lightning cable. Compatible with 17mm & 25mm ball mounts—perfect as a seat back mount for Rivian vehicles.]()
![Close-up of the EveryAmp Back Seat Tablet/Phone Mount Anchor for Rivian R1T, R1S, and R2, featuring a black plastic hook for hanging items and compatible with Rivian mount systems.]()
Back Seat Tablet/Phone Mount Anchor for Rivian R1T, R1S, and R2
Mount tablets and phones on the seat back for rear passengers.
From$20.00Why it costs less hereWhen you buy direct from the manufacturer, we pay lower fees and pass those savings on to you.
Low price guaranteeIf you find a lower price, show us and we'll match it.
Unit price /Coming Soon -

Qi2 Wireless Charging Phone Mount with Semiconductor Cooling
Cool your phone while charging for better battery health.
$35.00Why it costs less hereWhen you buy direct from the manufacturer, we pay lower fees and pass those savings on to you.
Low price guaranteeIf you find a lower price, show us and we'll match it.
Unit price /Coming Soon -
Adjustable-Angle Magnet Phone Mount for 17mm Ball Mounts
$15.00Why it costs less hereWhen you buy direct from the manufacturer, we pay lower fees and pass those savings on to you.
Low price guaranteeIf you find a lower price, show us and we'll match it.
Unit price /Coming Soon -
Phone/Tablet Clamp Mount for 17mm Ball Mounts
$15.00Why it costs less hereWhen you buy direct from the manufacturer, we pay lower fees and pass those savings on to you.
Low price guaranteeIf you find a lower price, show us and we'll match it.
Unit price /Coming Soon -
Universal Phone Clamp Mount for 17mm Ball Mounts
$15.00Why it costs less hereWhen you buy direct from the manufacturer, we pay lower fees and pass those savings on to you.
Low price guaranteeIf you find a lower price, show us and we'll match it.
Unit price /Coming Soon -
OBD2 to USB-C and USB-A Adapter
Get power to your devices from under the dash.
$20.00Why it costs less hereWhen you buy direct from the manufacturer, we pay lower fees and pass those savings on to you.
Low price guaranteeIf you find a lower price, show us and we'll match it.
Unit price /Coming Soon -
1.5M (5FT) USB-C to USB-C Cable
$8.00Why it costs less hereWhen you buy direct from the manufacturer, we pay lower fees and pass those savings on to you.
Low price guaranteeIf you find a lower price, show us and we'll match it.
Unit price /Coming Soon


Installation Demo
Phone Mount Dash Anchor for Rivian R1T & R1S