Follow the steps below to install and adjust a SnapPlate+ front license plate mount on a 2024-2025 (Highland) Tesla Model 3. We're here to help if you have questions or get stuck!
Highland Tesla Model 3 SnapPlate+ Instruction Guide
Installation Steps ➥
-
![Three black metal wall mounts arranged side by side on a white background.]()
Step 1
Plate mounts are shipped in the high position by default. If you prefer a different position, follow the Plate Height Adjustment instructions ☝️ to adjust before continuing.
-
![A person uses a screwdriver to attach a California license plate with SNAPPLATE and everyamp.com printed on it.]()
Step 2
Install your license plate using four of the included black or silver torx security screws.
-
![Close-up of a black plastic device with an arrow pointing to a small, textured section labeled OPEN beside a screw.]()
Step 3
Press the OPEN button on the right side of the base part.
-
![Black plastic SnapPlate with engraved SNAPPLATE 3 text. Features a rectangular base and vertical components at the top, with an orange arrow pointing downward.]()
Step 4
Insert into the center of the grille making sure the vertical bar is aligned with the vertical slot in the SnapPlate.
-
![Close-up of a black 3D-printed object with an engraved CLOSE label. An orange arrow points to the label, highlighting a square protruding component.]()
Step 5
Press the CLOSE button on the left side of the base.
Important! If the button is too difficult to fully close or the SnapPlate feels loose on the grille after it is closed, adjust the rotating latches following the Grille Depth Adjustment instructions. ☝️ -
![A close-up of a black plastic tool with text CLOSED inside an orange circle. The tool has screws and detailed ridges.]()
Step 6
Make sure the CLOSE button is flush with the SnapPlate body to ensure it is locked in place with the magnets engaged.
-
![Close-up of a screwdriver turning a screw on a black plastic device with a label marked OPEN.]()
Step 7
Optionally, tighten the black anti-theft security screw in the hole on the right side.
Note: It should take ~6 full turns to lock or unlock the screw. It does not need to be fully removed. -
![A hand installs a black plastic mount onto a grid structure behind a partially visible license plate.]()
Step 8
Don't forget to remove SnapPlates for automated car washes. Most touchless washes are fine, but better to be on the safe side!


Plate Height Adjustment Steps ➥
-
![Three black metal wall mounts for flat panel speakers, arranged in a row.]()
Step 1
Tesla SnapPlates ship in the high position by default, but are adjustable into 3 possible positions.
We recommend high for the best airflow to the grille. -
![Close-up of a screwdriver tightening a screw into a black, rectangular, plastic frame with multiple screws visible.]()
Step 2
Remove the two screws holding the plate mount on the base.
For installation in the high position go to Step 3.
For installation in the center position go to Step 4.
For installation in the low position go to Step 5. -
![Metal bracket with a rectangular base plate featuring multiple holes for mounting, positioned vertically against a white background.]()
Step 3 (High)
Position the plate mount with the bottom holes lined up with the base and install screws.
Go to Step 6 -
![A metal wall bracket with a rectangular component attached, featuring four mounting holes positioned at each corner.]()
Step 4 (Center)
Position the plate mount with center holes lined up with the base and install screws.
Go to Step 6 -
![A black metal wall mount bracket with three screws visible, featuring a rectangular base and two elongated slots.]()
Step 5 (Low)
Rotate the plate mount 180 degrees to line up the (now) top screw holes with the base and install screws.
Go to Step 6 -
![Close-up of a persons hands attaching a novelty license plate with SNAPPLATE text using a screwdriver, against a plain background.]()
Step 6
If not already installed, install the license plate using four of the included black or silver security screws.


Grille Depth Adjustment Steps ➥
-
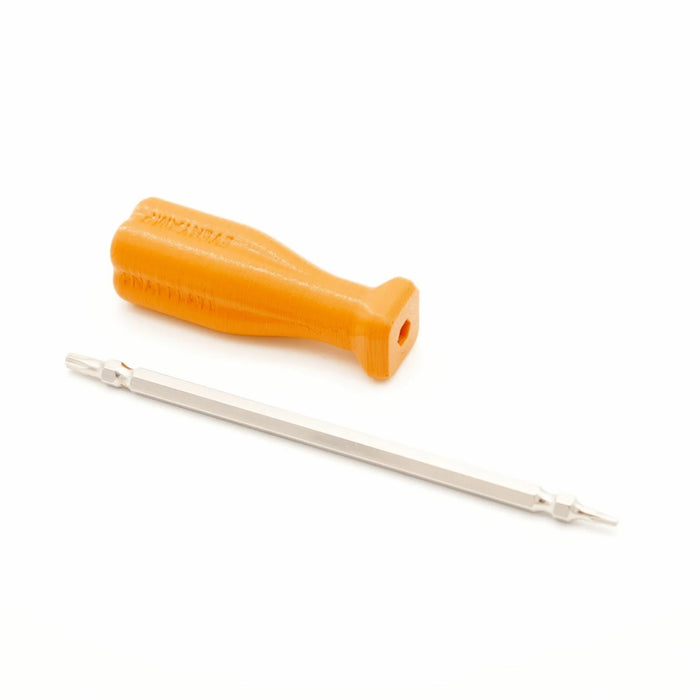
![Orange screwdriver handle and a double-ended metal screwdriver bit placed on a white background.]()
Step 1
Remove the T10/T25 bit from the screwdriver handle and reinstall with the smaller T10 bit facing out.
-
![A black plastic bracket with mounting arms and a series of slots with orange-circled screws, likely used for holding or securing components.]()
Step 2
Locate the T10 torx screws in the center of each rotating latch.
- Go to Step 3 to loosen latches
- Go to Step 4 to tighten latches
-
![Screwdriver tightening a screw on a stacked, black 3D-printed part with arrows indicating direction.]()
Step 3
Turn each screw counterclockwise (lefty loosey) 1/2 turn to loosen the latches by 0.25mm. Pull each latch with your fingers to make sure they are extended and then try the fit on the grille.
Repeat up to four times (two full turns) as needed.
Important! Contact support before proceeding past two turns. If loosened more than two turns, the SnapPlate could become stuck in the grille and it may be very difficult to remove. -
![A screwdriver tightens a screw into stacked rectangular objects with arrow indicators on the screws.]()
Step 4
Turn each screw clockwise (righty tighty) 1/2 turn to tighten the latches by 0.25mm and try the fit on the grille.
Repeat as needed.


Loading...
EveryAmp
| SKU:
SPPM32026US
$140.00
$154.97
Why it costs less here
When you buy direct from the manufacturer, we pay lower fees and pass those savings on to you.
Low price guarantee
If you find a lower price, show us and we'll match it.
Unit price
/
Coming Soon
Shipping calculated at checkout.
Tesla Model 3 SnapPlate Front License Plate Holder - 2026-Feb 2024 Premium & Standard / Strength-Optimized (SnapPlate+) is backordered and will ship as soon as it is back in stock.