Follow the steps below to install a dash anchor with or without rigid arm, Qi2 wireless charger, and OBD2 USB-C power supply in aGen1 (2022-2024) or Gen2 (2025-2026) Rivian R1T or R1S. We're here to help if you have questions or get stuck!
Rivian R1T & R1S Dash Anchor with Rigid Arm / Qi2 Wireless Charger / OBD2 Power Supply Instruction Guide
Anchor Installation Steps ⮕
-
![Close-up of a car interior and a back panel of an electronic device, both marked with numbered orange labels 1 and 3.]()
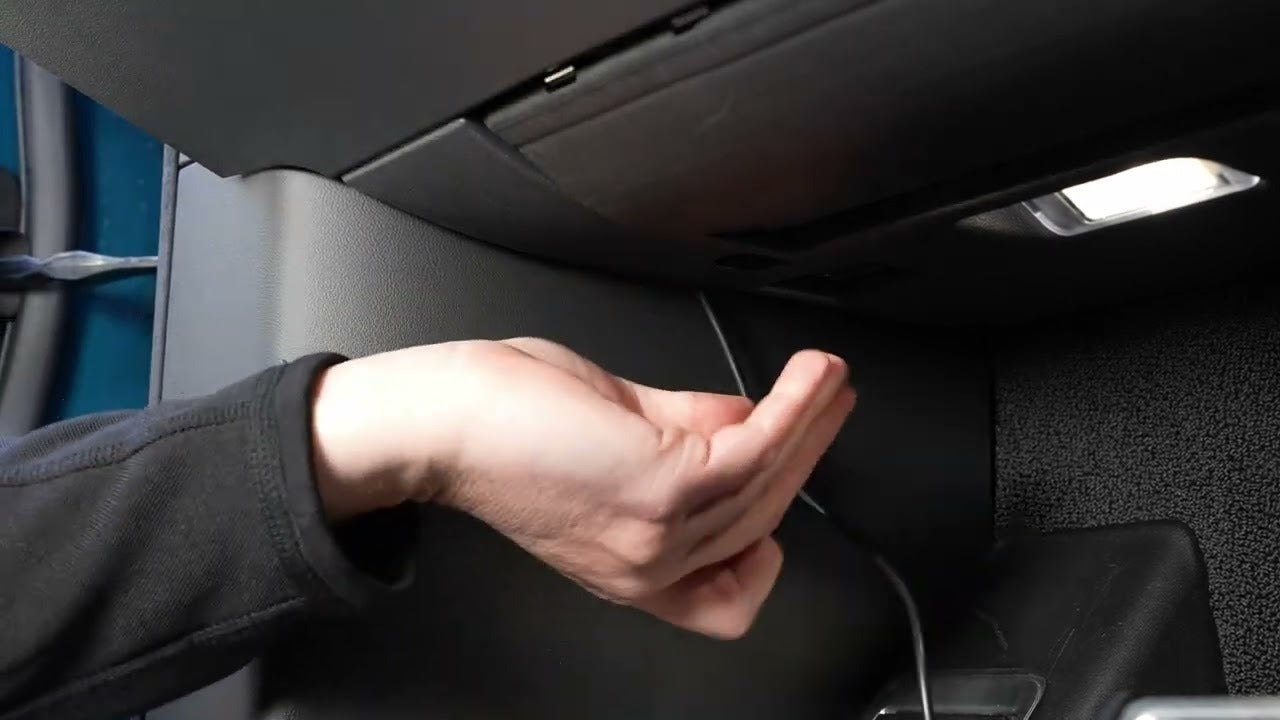
STEP 1
Behind the center screen on the driver's side, locate the five vent openings shown above with the screen installed (upper) and screen removed (lower).
The dash anchor clamps into the openings marked 1 and 3. -
![A hand holding a black plastic clip alongside a digital display on a wood surface, with numbered markers showing dimensions.]()
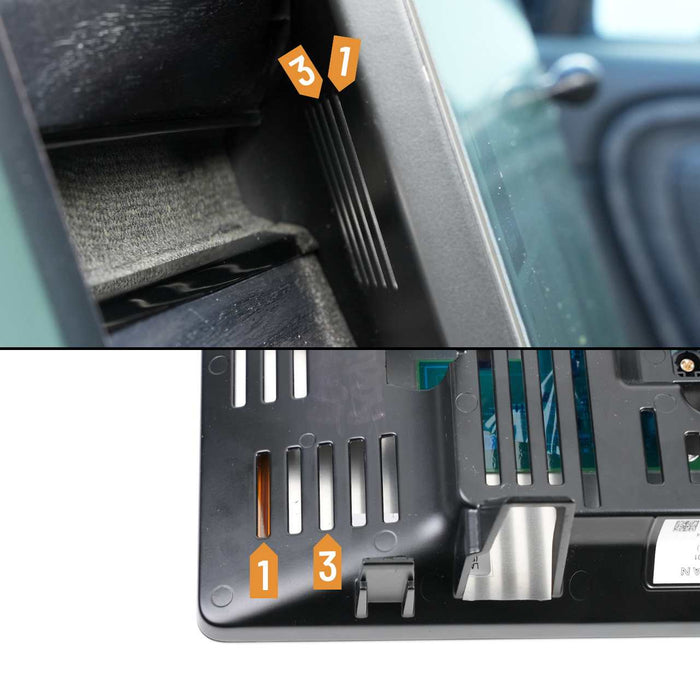
STEP 2
Position the anchor by the screen as shown with your left index finger behind it.
The next steps are going to position the hooks marked 1 and 3 with the corresponding slots behind the screen.
-
![A person installs a black component around a tablet or device, demonstrating a step labeled 1 in a process.]()
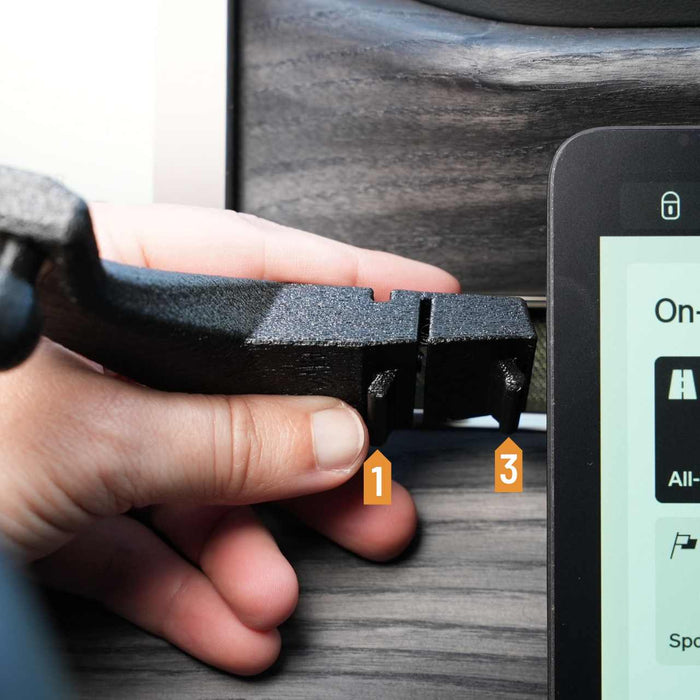
STEP 3
Slide the anchor behind the screen until the 1 hook is in the 1 slot.
-
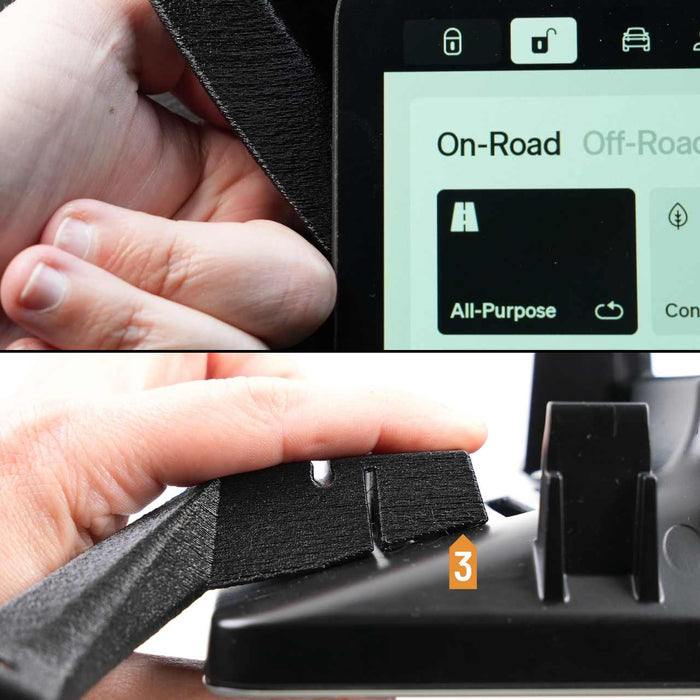
![Close-up of a hand holding a black foam strip near a touchscreen displaying On-Road. Below, another hand holds the foam strip against a black plastic surface labeled with the number 3.]()
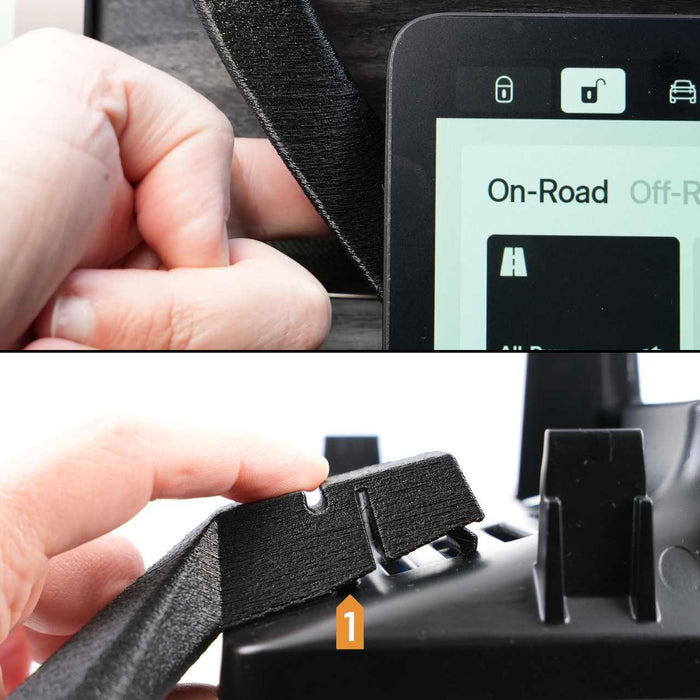
STEP 4
Move your finger over the end of the anchor to press the 3 hook into the 3 slot.
The anchor should tilt towards the dash and click into place.
Note: If the anchor is not staying in place, it's likely not fully seated in the slots because it's positioned too high. Go back to step 3 and position it slightly lower.
-
![A screwdriver is inserted between two touchscreens in a vehicle dashboard, set against a wood grain panel.]()
STEP 5
Tighten the screw to expand the anchor and secure the hooks in place.
To install a phone mount, see the 17mm accessories installation instructions below 👇 -
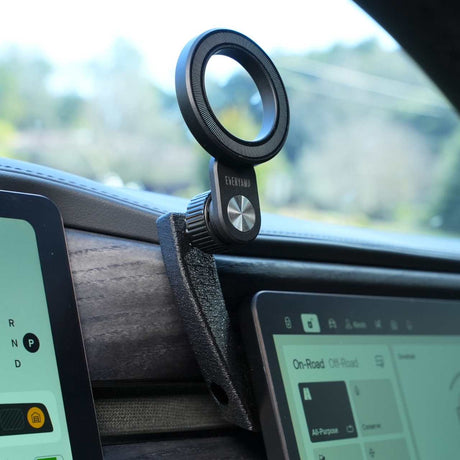
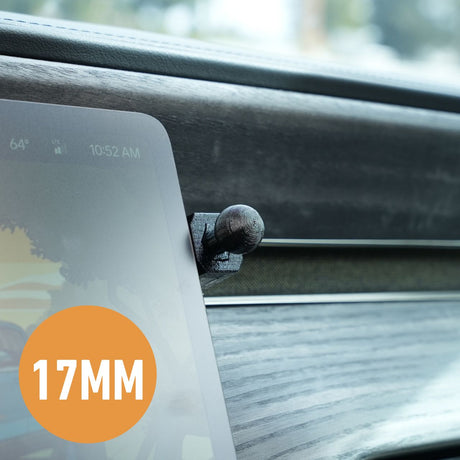
![EveryAmp 17mm ball mount installed in a Rivian R1T]()
STEP 6
Important! Some customers have reported issues with the anchor not staying place. In 100% of those cases, they had it installed slightly too high where the hooks were not fully seated in the slots.
If that happens to you, loosen the screw and go back to Step 3 to get it fully seated. Reach out to support for help if needed!

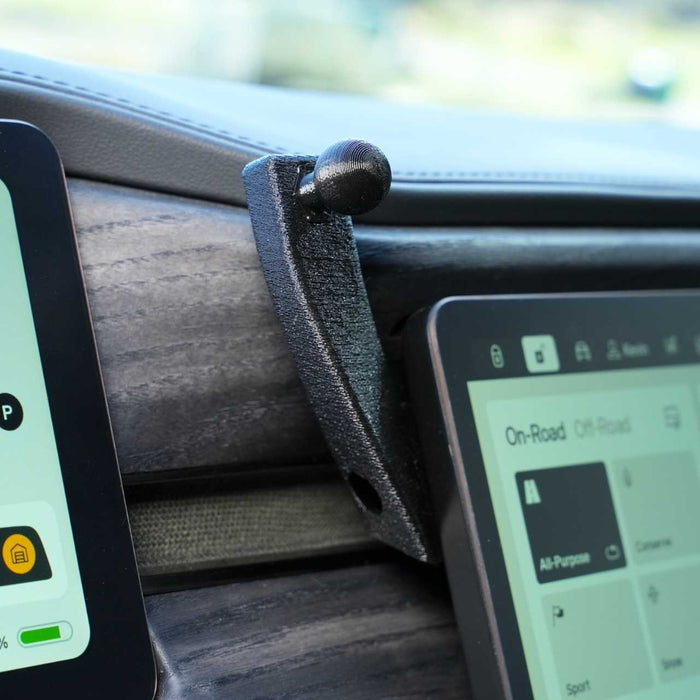
17mm Accessories Installation Steps ⮕
-
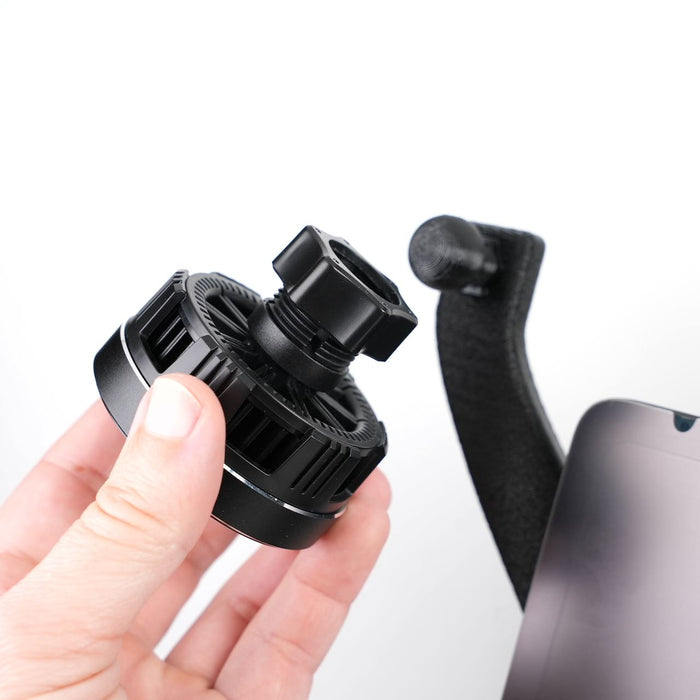
![A hand holding a black phone mount with a gear mechanism, positioned next to a smartphone on a black stand.]()
STEP 1
Loosen and remove the nut on the phone mount socket.
-
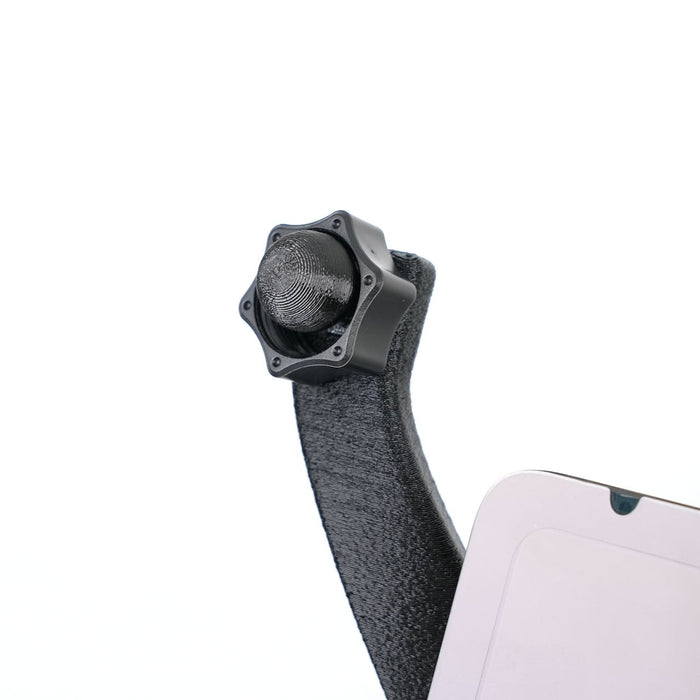
![Close-up of a black knob attached to a textured arm, next to a partially visible rectangular device.]()
STEP 2
Place the nut over the ball mount.
-
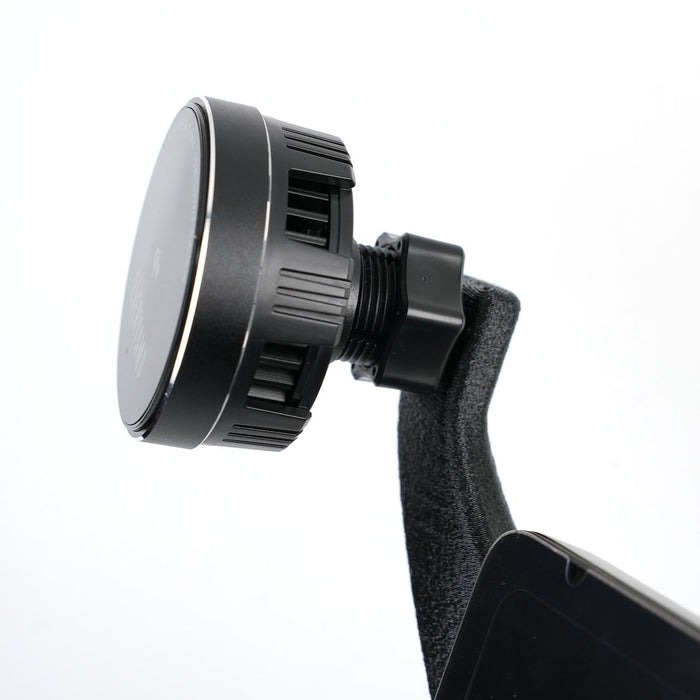
![Close-up of a black magnetic car phone mount with an adjustable screw and a phone partially visible in the holder against a white background.]()
STEP 3
Place the phone mount socket on the ball mount and align the nut straight to prevent cross threading.
-
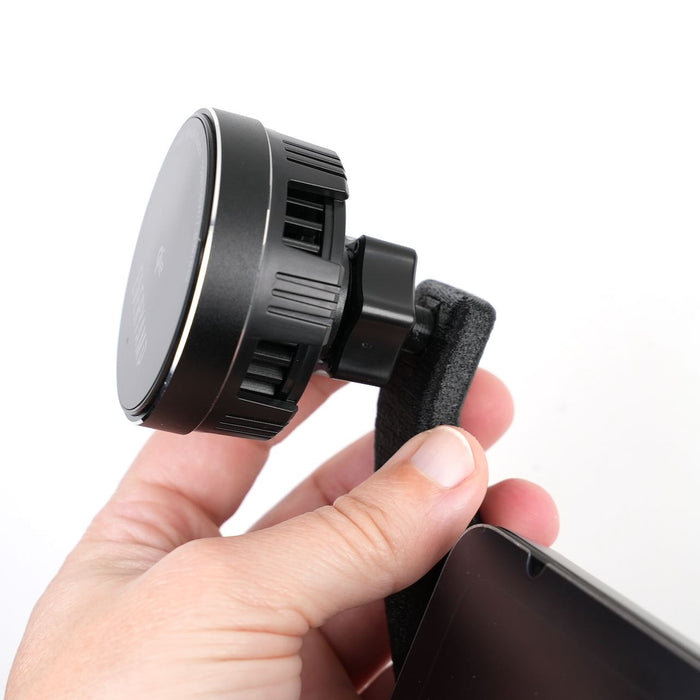
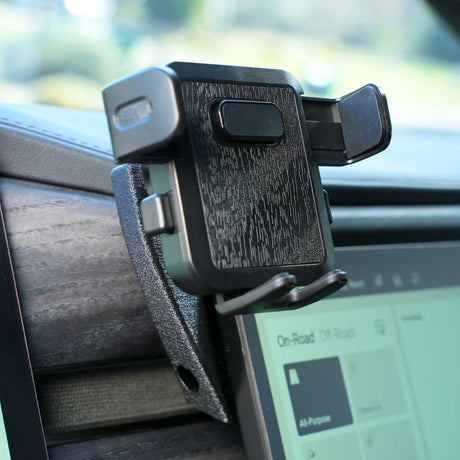
![A person holds a black, circular magnetic phone holder with one hand, attaching it to a fabric-covered car vent mount.]()
STEP 4
With the phone mount positioned as desired, tighten the nut to secure it.
To install an OBD2 USB-C power adapter and route a USB-C cable, see the installation instructions below 👇
-
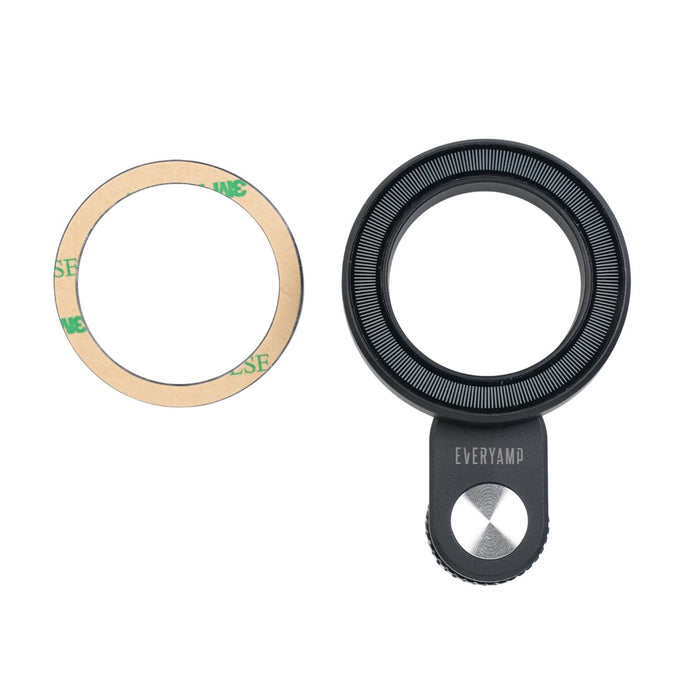
![A black camera lens attachment with a small grip and a separate adhesive ring on a plain background.]()
STEP 5 (OPTIONAL)
Note: Some magnet mounts, including the EveryAmp magnet mount (pictured), include an adhesive metal ring that can be installed on a device or case that is not compatible with MagSafe mounts.
Important! Do not use the metal ring between the mount and a MagSafe device or it will significantly reduce the strength of the magnets!
OBD2 Power Supply & USB-C Cable Installation Steps ⮕
-
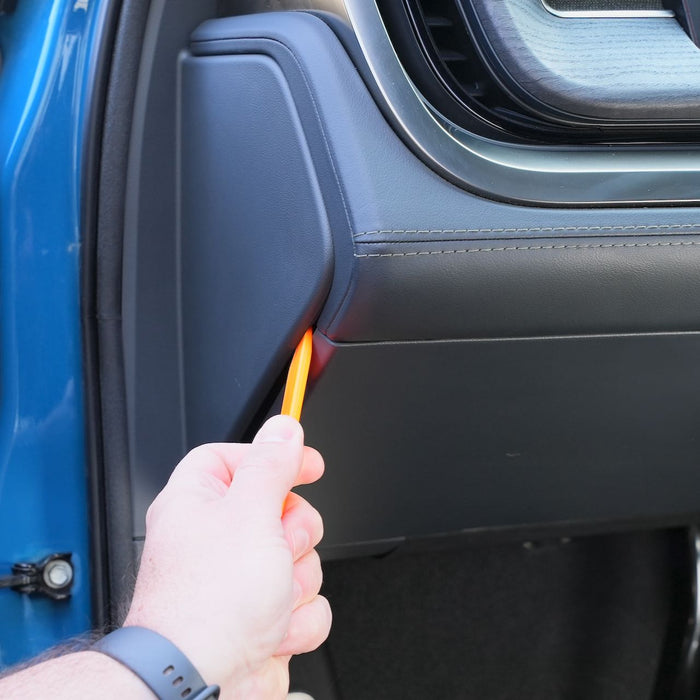
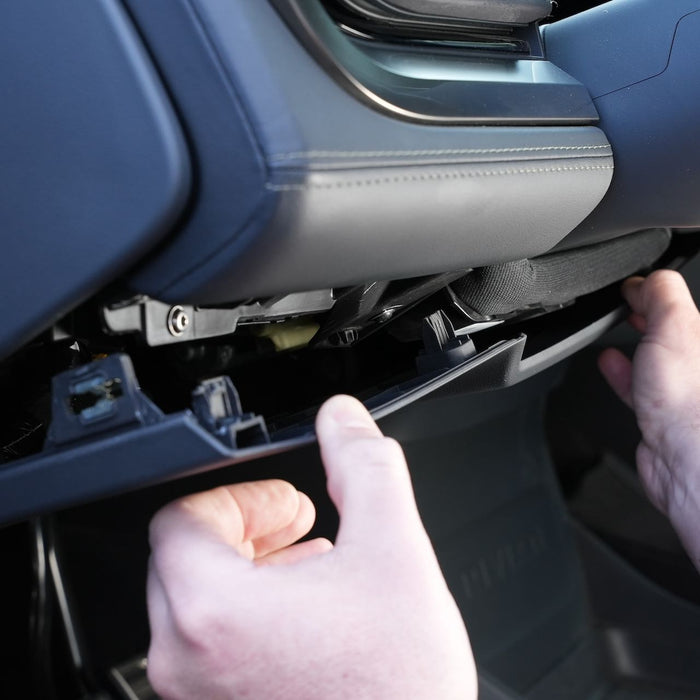
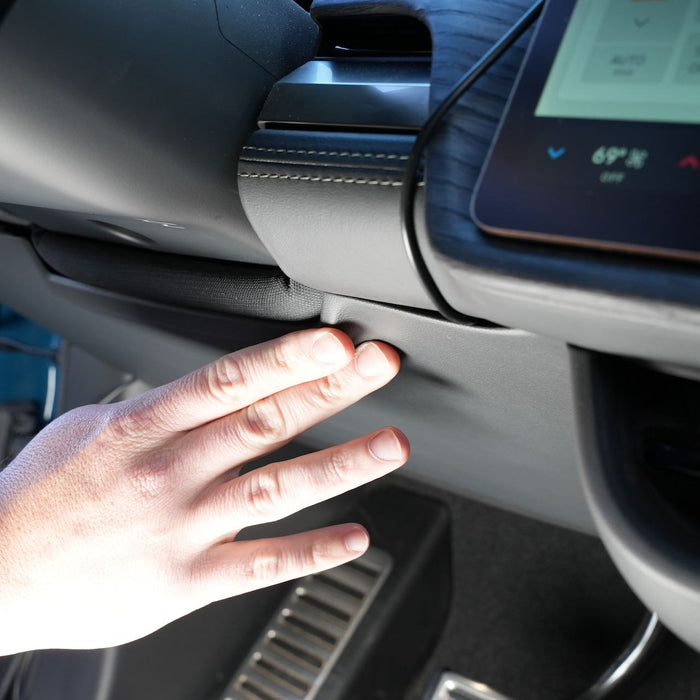
![A person uses an orange plastic tool to pry open a panel on the interior door of a blue vehicle.]()
STEP 1
Use a plastic trim pry tool to loosen the driver's side dash cover.
-
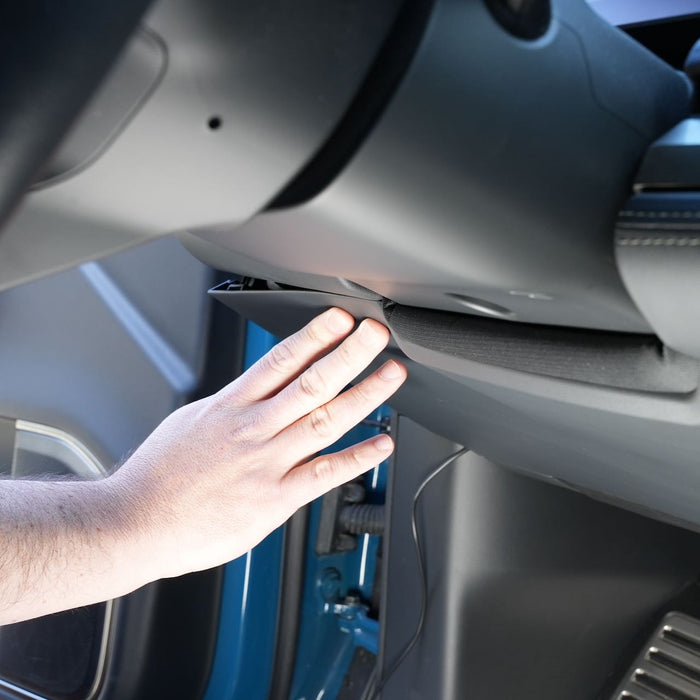
![Hands are removing a cars glove compartment panel, exposing the interior components beneath the dashboard.]()
STEP 2
Pull down on the cover below the steering wheel to loosen the clips.
-
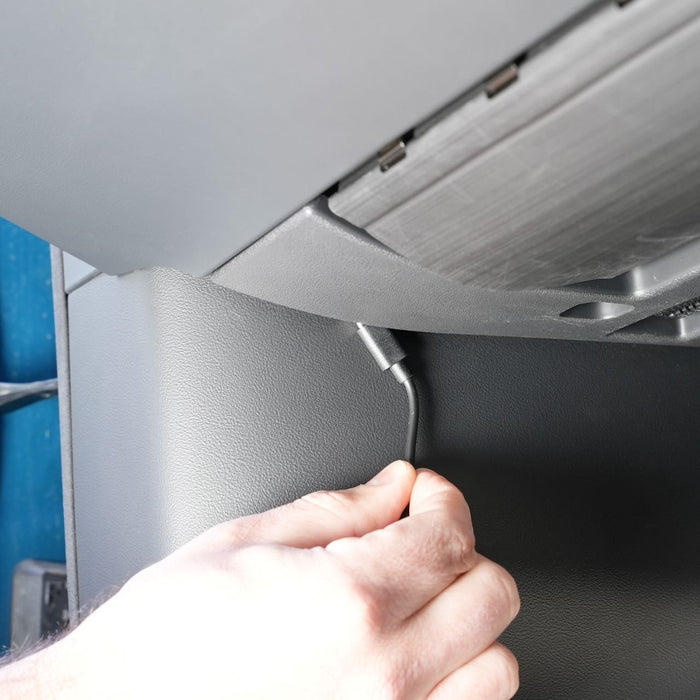
![A hand plugs a cable into a port located beneath a dashboard inside a vehicle.]()
STEP 3
Route the USB-C cable through the opening near the driver's left foot.
-
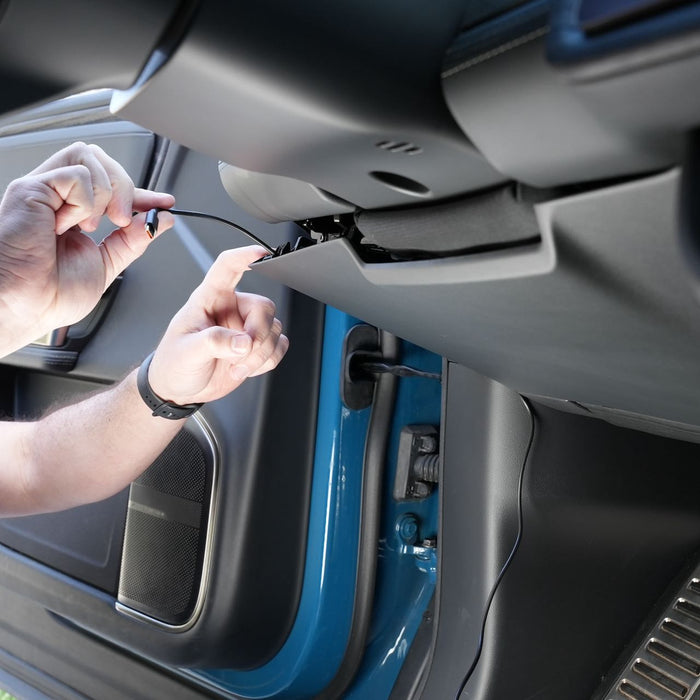
![A person connects a cable to an open compartment under a car dashboard.]()
STEP 4
Pull the USB-C cable partially out of the open cover.
-
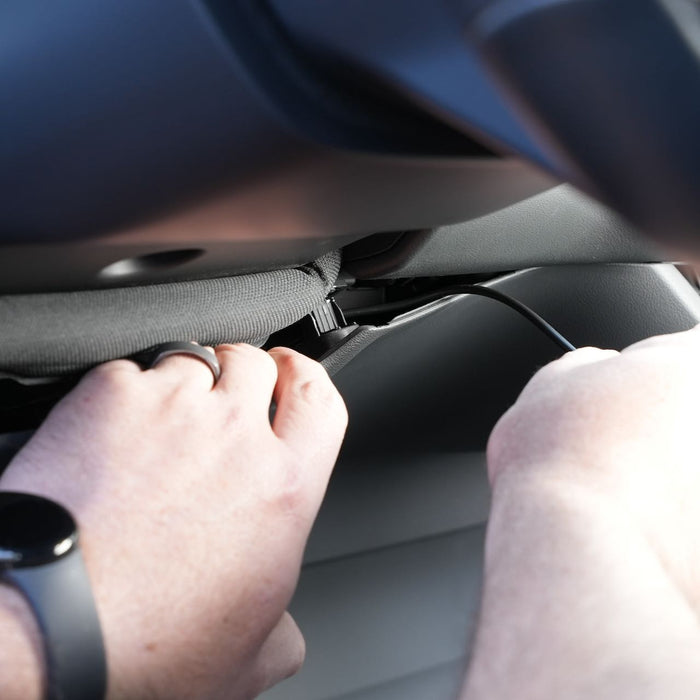
![Hands adjusting cables under a car dashboard, wearing a wristwatch and a ring.]()
STEP 5
Route the USB-C cable behind the cover, past the steering column, just to the left of the center screen and to the right of the nearest clip.
-
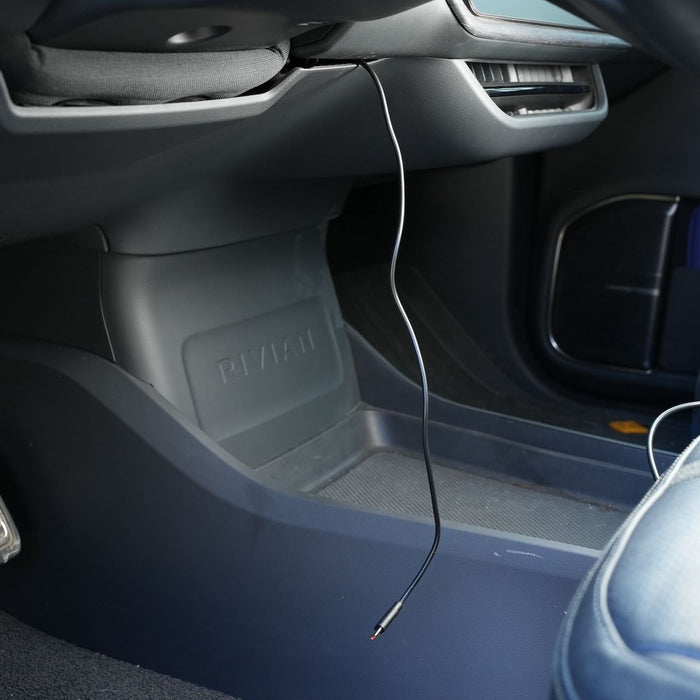
![A single black cable hangs from the vehicle dashboard area, near the passenger seat and footwell. The cars interior is mostly grey with some blue trim visible.]()
STEP 6
Pull the cable until about 16 inches is available to route up to the Qi2 charger.
-
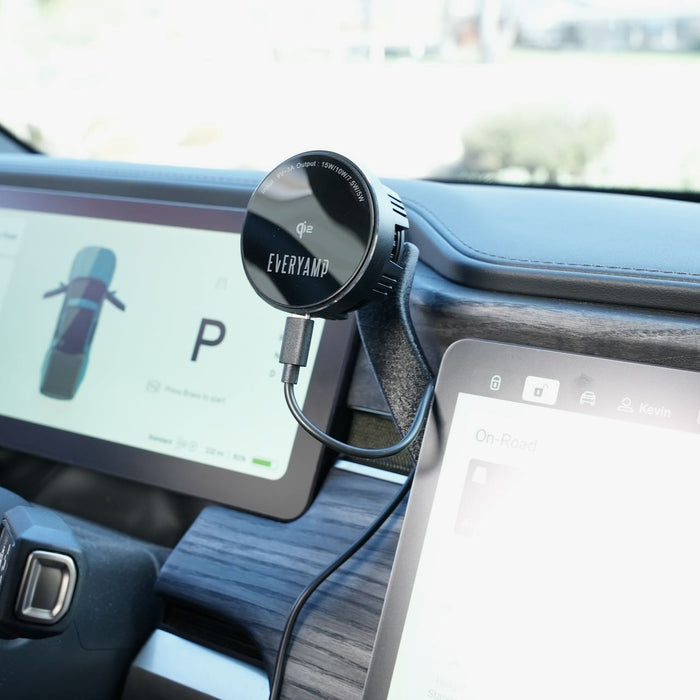
![Person installing a circular device on an electric vehicles wooden dashboard. Two digital screens display vehicle information and settings.]()
STEP 7
Route the cable up the dash and behind the dash anchor arm.
-
![A black car dashboard phone mount is attached to a vent, holding a charging cable. Two digital screens display navigation details and a parked car symbol.]()
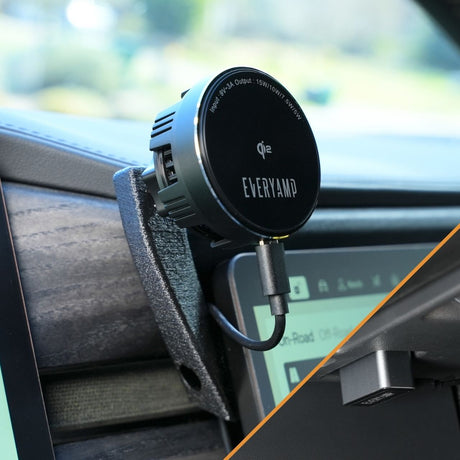
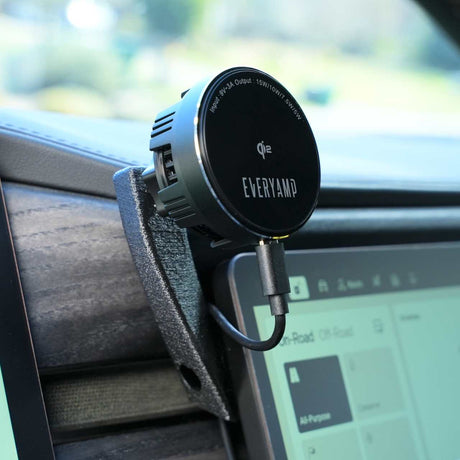
STEP 8
Connect the cable to the Qi2 charger and tidy up the cable.
-
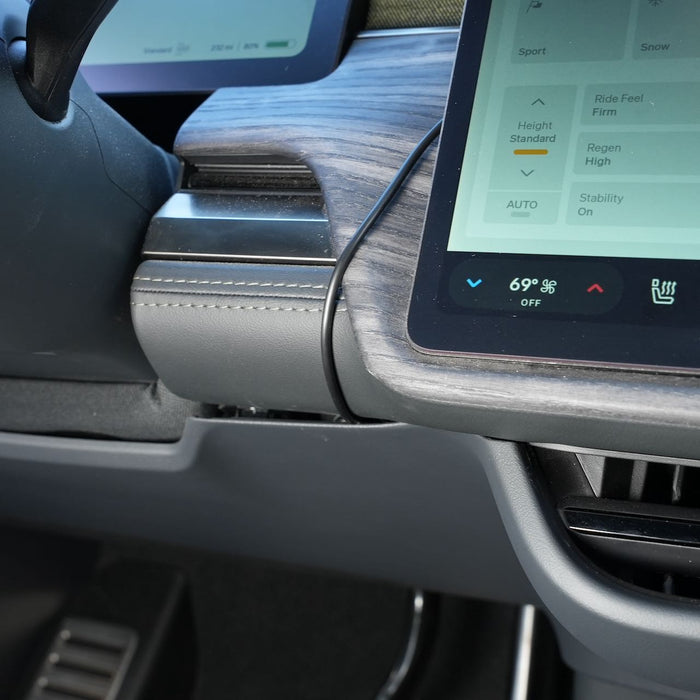
![Car dashboard close-up showing a touchscreen with climate control settings, wood trim, and visible USB cable. Temperature is set to 69°F.]()
STEP 9
Feed any excess cable behind the cover.
-
![Hand pressing button near dashboard in a car interior, showing close-up of a display and air vent.]()
STEP 10
Push in the cover to secure the clip to the left of the cable.
-
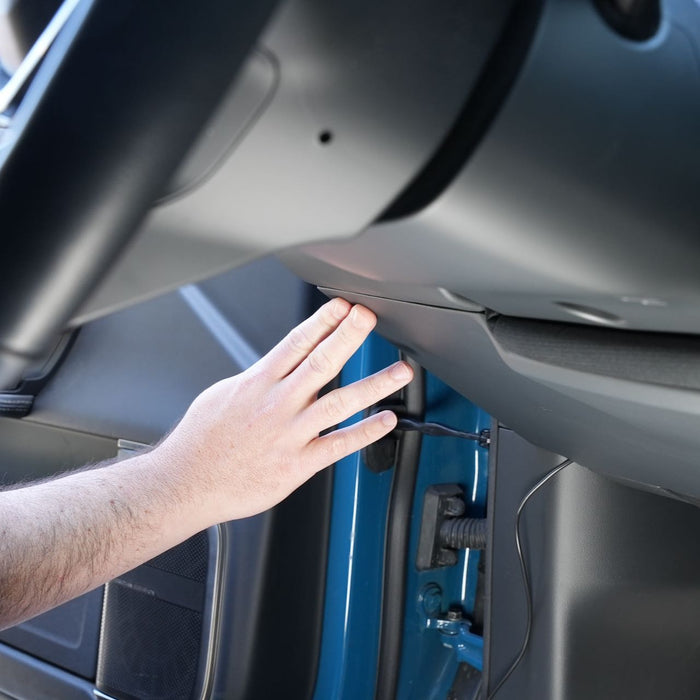
![A persons hand reaching to open the glove compartment in a vehicles dashboard.]()
STEP 11
Push in the cover to secure the clip to the left of the steering column.
-
![A persons hand reaching under the steering column of a vehicles dashboard, close to a blue panel and a speaker.]()
STEP 12
Push in the cover to secure the last clip on the cover under the dash.
-
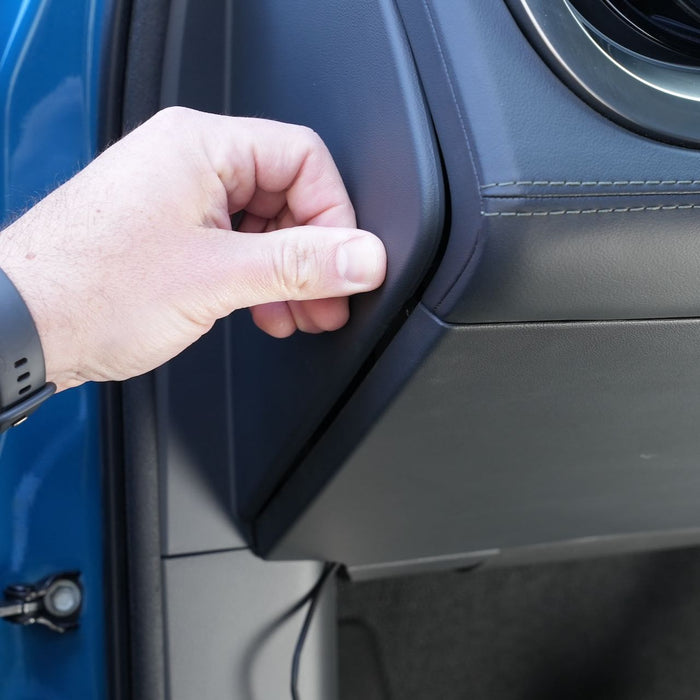
![Hand pulling on the edge of a car’s dashboard cover, revealing a small gap.]()
STEP 13
Push to secure the left side cover.
-
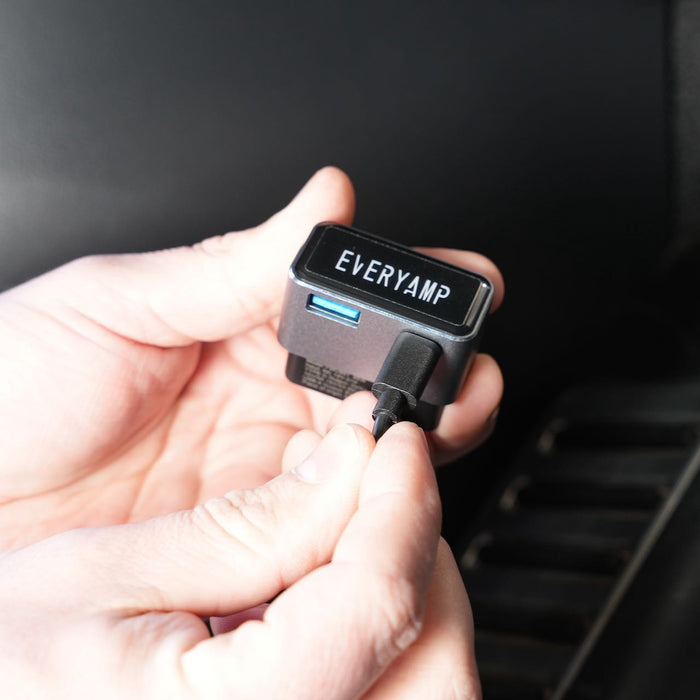
![Hands holding a small electronic device labeled EVERYAMP with a USB port, as a cable is being plugged in.]()
STEP 14
Under the dash, plug the USB-C cable into the OBD2 USB-C Port.
-
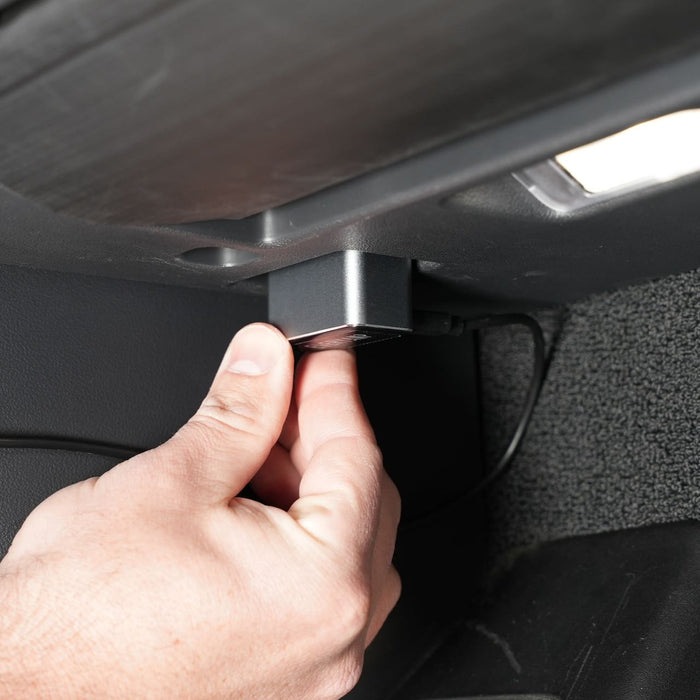
![A hand plugging a small device into a port under a car dashboard.]()
STEP 15
With the USB-C cable routed away from the driver's feet, plug the OBD2 power supply into the OBD2 port.
-
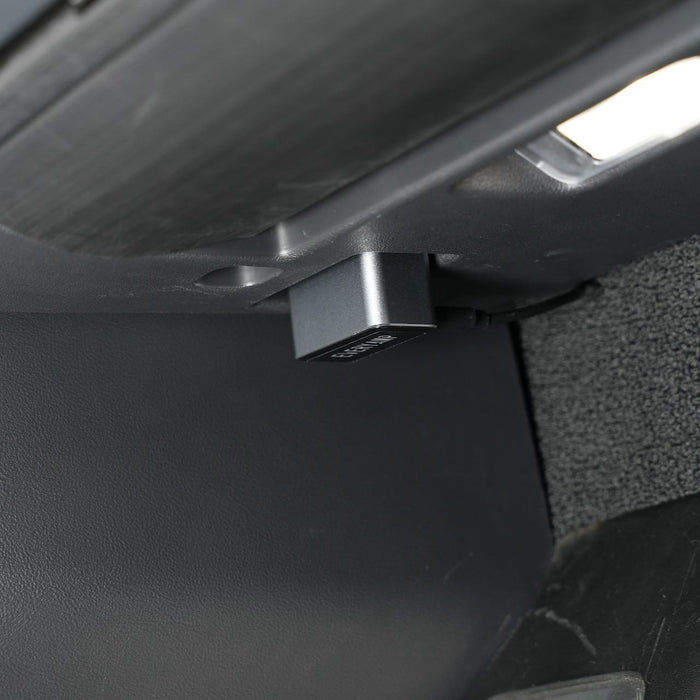
![A small black device with a label is plugged into a socket below a dashboard inside a vehicle. The cars interior is partially visible, including textured and smooth surfaces.]()
STEP 16
Push any excess cable up behind the cover.
Shop Phone holders and mounts
-

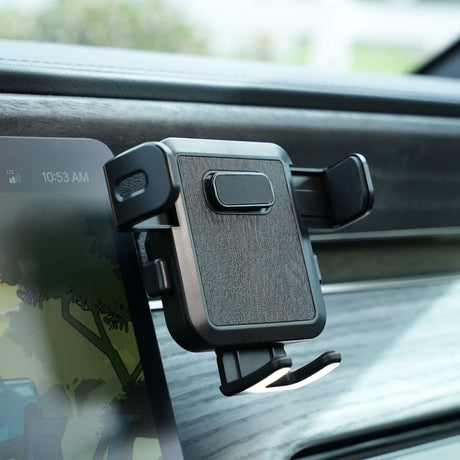
![EveryAmp 17mm ball mount installed in a Rivian R1T]()
![EveryAmp MagSafe-compatible magnet mount installed in a Rivian R1T]()
![EveryAmp Qi2 charger and OBD2 power supply installed in a Rivian R1T]()
![EveryAmp Qi2 charger installed in a Rivian R1T]()
![EveryAmp universal phone mount clamp installed in a Rivian R1T]()
![Close-up of a Phone Mount Dash Anchor by EveryAmp for Rivian R1T/R1S, with a tablet held in place by a 17MM ball mount. The stylish gray interior features wood-like paneling, and the tablet displays time and temperature.]()
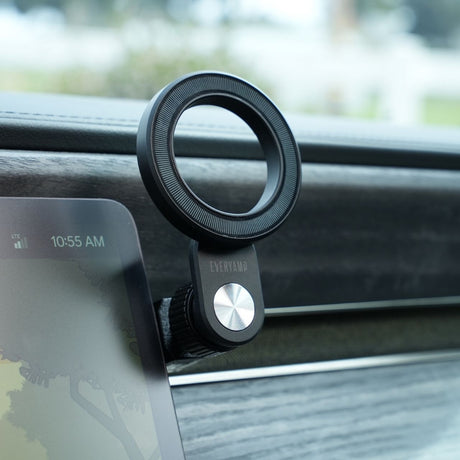
![Close-up of an EveryAmp Phone Mount Dash Anchor for Rivian R1T and R1S, featuring a sleek MagSafe charger with a circular design and metallic center. A digital display beside it shows the time as 10:55 AM.]()
![The EveryAmp Phone Mount Dash Anchor for Rivian R1T and R1S attaches to the car dashboard with adjustable arms and a textured surface, while a MagSafe charger integrates seamlessly next to it, alongside a digital display showcasing a colorful illustration against the wood grain finish.]()
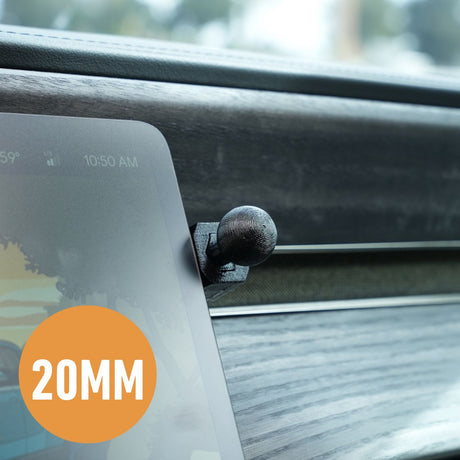
![A close-up shows an EveryAmp Phone Mount Dash Anchor for Rivian R1T and R1S, featuring a black knob holding a screen with colorful graphics on a textured dashboard. An orange 20MM circle hints at the sophisticated design of vehicles like the R1T and R1S.]()
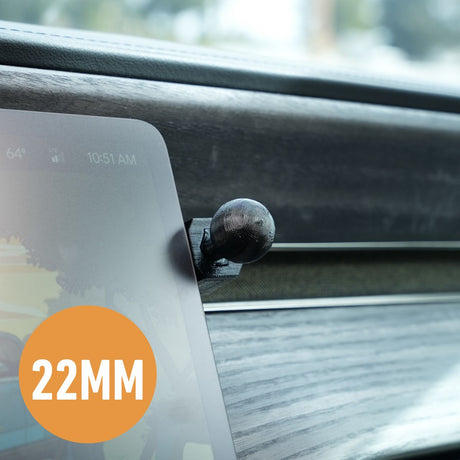
![Close-up of EveryAmps 22mm Phone Mount Dash Anchor for Rivian R1T, elegantly attached to the dashboard. The device screen displays the time (10:51 AM), temperature (64°F), and part of an image, with an orange 22MM circle prominently in view. Wood grain texture adds a touch of sophistication.]()
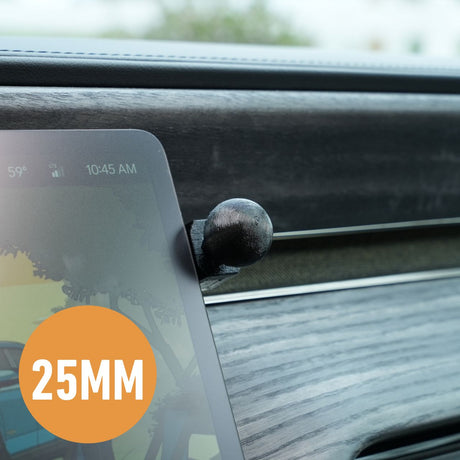
![A close-up of the Rivian R1Ts interior dashboard displays a digital screen with an EveryAmp Phone Mount Dash Anchor, compatible with MagSafe chargers, installed to the right. An orange circle in the bottom left corner reads 25MM, and the temperature and time are displayed.]()
Phone Mount Dash Anchor for Rivian R1T and R1S
Mount 17mm, 20mm, 22mm, or 25mm accessories to the dash.
From$30.00Why it costs less hereWhen you buy direct from the manufacturer, we pay lower fees and pass those savings on to you.
Low price guaranteeIf you find a lower price, show us and we'll match it.
Unit price /Unavailable -
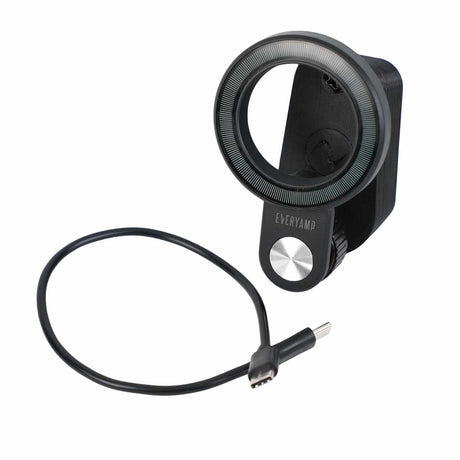
![Close-up of the EveryAmp Back Seat Tablet/Phone Mount Anchor for Rivian R1T, R1S, and R2, featuring a textured surface and adjustable knob, compatible with 17mm and 25mm ball mounts.]()
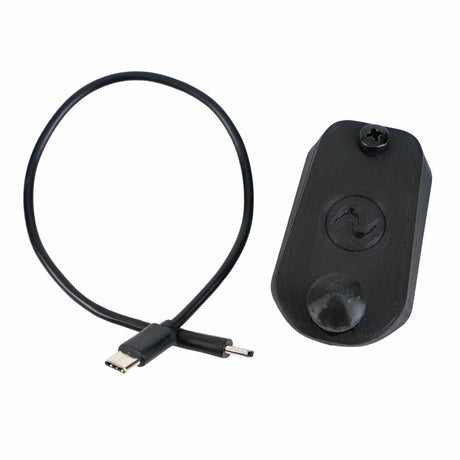
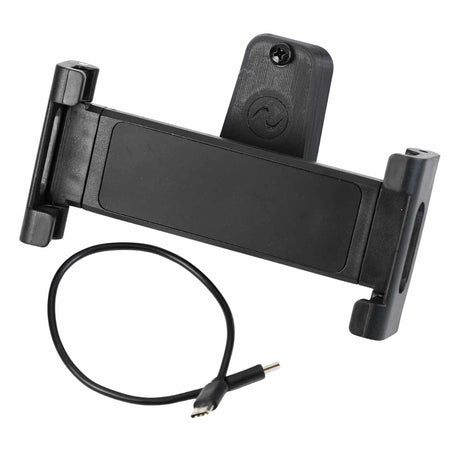
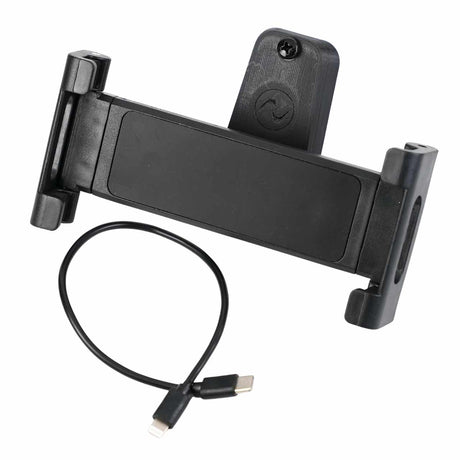
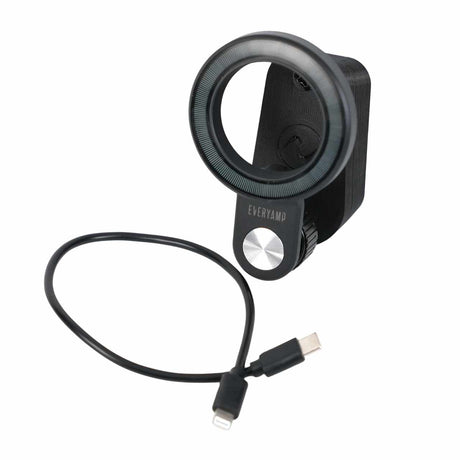
![A black USB-C cable beside the EveryAmp Back Seat Tablet/Phone Mount Anchor for Rivian R1T, R1S, and R2—a compact black device with a logo, screw, and round protrusion. Compatible with 17mm and 25mm ball mounts.]()
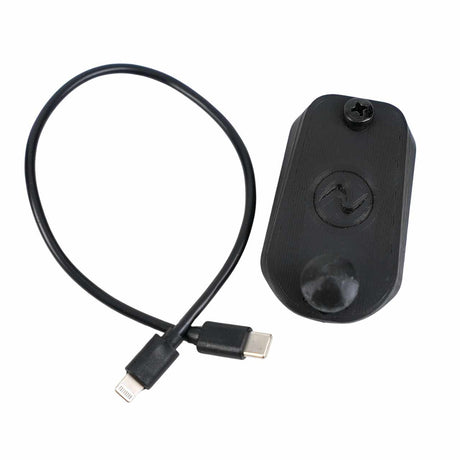
![The EveryAmp Back Seat Tablet/Phone Mount Anchor for Rivian R1T, R1S, and R2 includes a black device with a circular symbol and a USB-C to Lightning cable—compatible with Seat Back Mounts and fits 17mm & 25mm ball mounts.]()
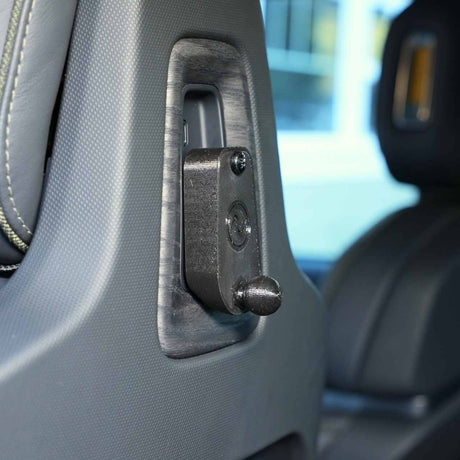
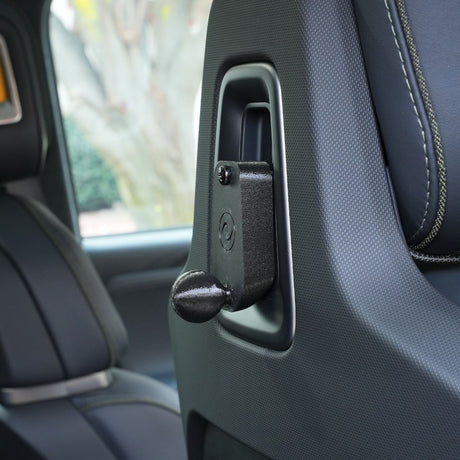
![The EveryAmp Back Seat Tablet/Phone Mount Anchor for Rivian R1T, R1S, and R2 attaches to a car seat headrest, features 17mm/25mm ball mounts, and is designed for secure device mounting inside the vehicle.]()
![The EveryAmp Back Seat Tablet/Phone Mount Anchor for Rivian R1T, R1S, and R2 is a black adjustable holder with a mounting bracket, offers 17mm and 25mm ball mount options, and is compatible with phone or tablet devices. USB-C cable shown detached.]()
![EveryAmp Back Seat Tablet/Phone Mount Anchor for Rivian R1T, R1S, and R2 includes a black adjustable holder with mounting bracket, supports 17mm/25mm ball mounts, plus a USB-C to Lightning charging cable placed underneath.]()
![The EveryAmp Back Seat Tablet/Phone Mount Anchor for Rivian R1T, R1S, and R2 attaches to seat headrests and supports 17mm and 25mm ball mounts for secure device mounting in your Rivian vehicle.]()
![EveryAmp's black Back Seat Tablet/Phone Mount Anchor for Rivian R1T, R1S, and R2 features a circular opening and comes with a USB-C charging cable. It fits 17mm or 25mm ball mounts and is ideal for use as a seat back mount.]()
![The EveryAmp Back Seat Tablet/Phone Mount Anchor for Rivian R1T, R1S, and R2 features a black circular grip and is shown next to a USB-C to Lightning cable. Compatible with 17mm & 25mm ball mounts—perfect as a seat back mount for Rivian vehicles.]()
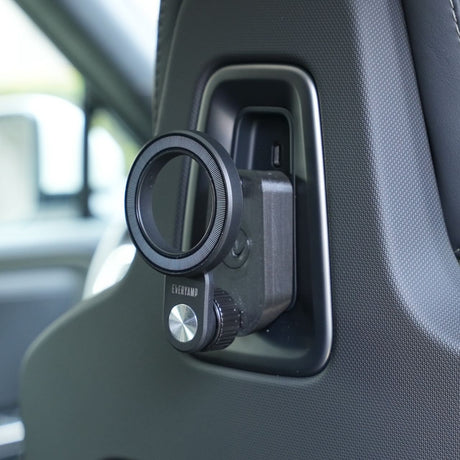
![Close-up of the EveryAmp Back Seat Tablet/Phone Mount Anchor for Rivian R1T, R1S, and R2, featuring a black plastic hook for hanging items and compatible with Rivian mount systems.]()
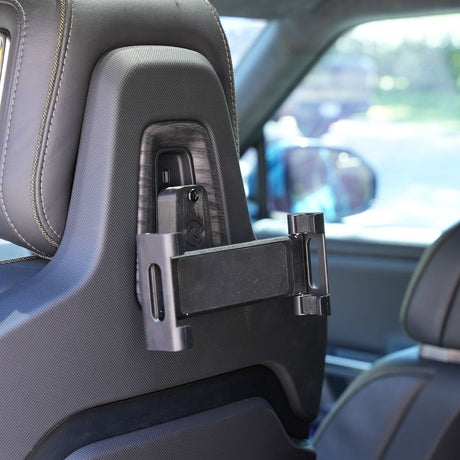
Back Seat Tablet/Phone Mount Anchor for Rivian R1T, R1S, and R2
Mount tablets and phones on the seat back for rear passengers.
From$20.00Why it costs less hereWhen you buy direct from the manufacturer, we pay lower fees and pass those savings on to you.
Low price guaranteeIf you find a lower price, show us and we'll match it.
Unit price /Unavailable -

Qi2 Wireless Charging Phone Mount with Semiconductor Cooling
Cool your phone while charging for better battery health.
$35.00Why it costs less hereWhen you buy direct from the manufacturer, we pay lower fees and pass those savings on to you.
Low price guaranteeIf you find a lower price, show us and we'll match it.
Unit price /Unavailable -
Adjustable-Angle Magnet Phone Mount for 17mm Ball Mounts
$15.00Why it costs less hereWhen you buy direct from the manufacturer, we pay lower fees and pass those savings on to you.
Low price guaranteeIf you find a lower price, show us and we'll match it.
Unit price /Unavailable -
Phone/Tablet Clamp Mount for 17mm Ball Mounts
$15.00Why it costs less hereWhen you buy direct from the manufacturer, we pay lower fees and pass those savings on to you.
Low price guaranteeIf you find a lower price, show us and we'll match it.
Unit price /Unavailable -
Universal Phone Clamp Mount for 17mm Ball Mounts
$15.00Why it costs less hereWhen you buy direct from the manufacturer, we pay lower fees and pass those savings on to you.
Low price guaranteeIf you find a lower price, show us and we'll match it.
Unit price /Unavailable -
OBD2 to USB-C and USB-A Adapter
Get power to your devices from under the dash.
$20.00Why it costs less hereWhen you buy direct from the manufacturer, we pay lower fees and pass those savings on to you.
Low price guaranteeIf you find a lower price, show us and we'll match it.
Unit price /Unavailable -
1.5M (5FT) USB-C to USB-C Cable
$8.00Why it costs less hereWhen you buy direct from the manufacturer, we pay lower fees and pass those savings on to you.
Low price guaranteeIf you find a lower price, show us and we'll match it.
Unit price /Unavailable


Installation Demo
Phone Mount Dash Anchor for Rivian R1T & R1S