Follow the steps below to replace the cabin air filter in a Gen1 (2022-2024) or Gen2 (2025-2026) Rivian R1T or R1S. We're here to help if you have questions or get stuck!
Rivian R1T & R1S Cabin Air Filter Instruction Guide
Installation Steps ➥
-
![An open car hood reveals the storage compartment beneath. Two orange arrows point upward, likely indicating features or components of interest inside the compartment.]()
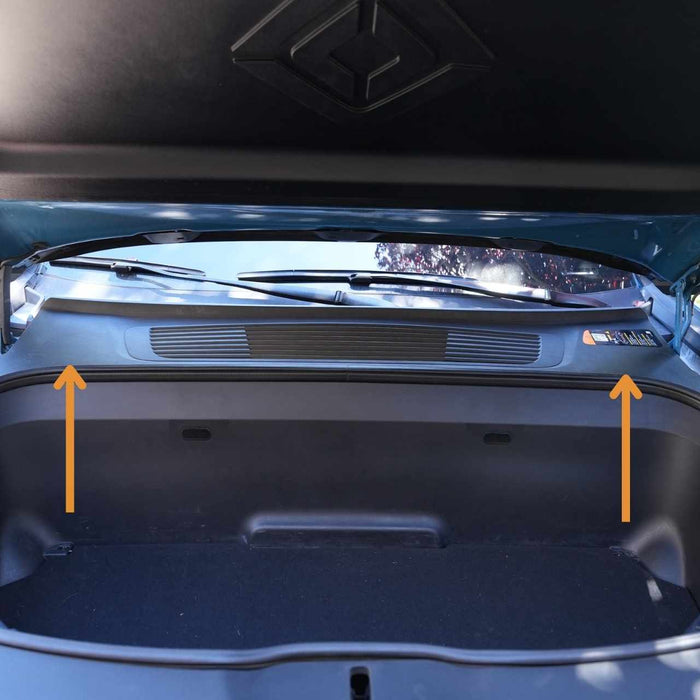
STEP 1
Open the hood and locate the intake cover.
-
![Hands adjusting a panel inside an open car trunk, with a visible orange arrow indicating direction.]()
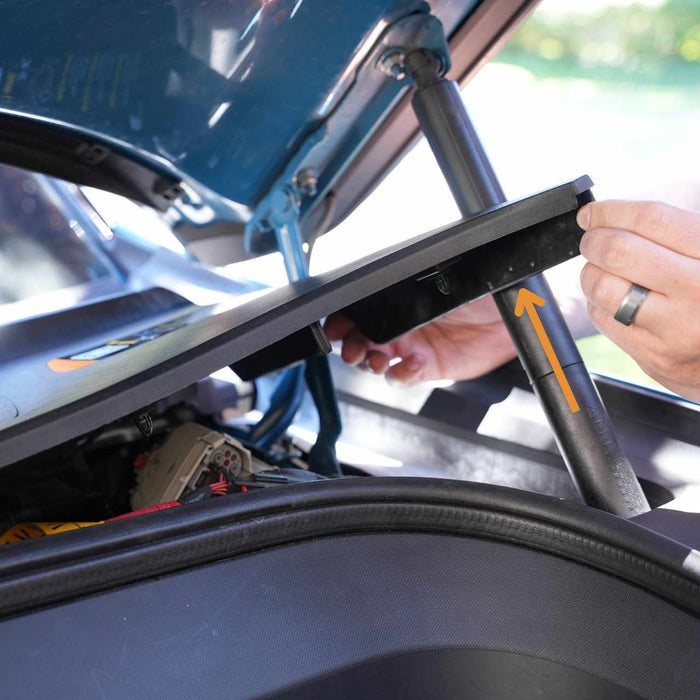
STEP 2
Starting at the sides, remove the cover by lifting up to release the clips.
-
![A view under a car hood showing an internal monitor and engine components with an orange arrow and circle highlighting specific parts.]()
STEP 3 (GEN2 ONLY)
While taking care to not damage the sensor circled in orange, remove the filter housing and move it to the right.
-
![Hand pulling a car cabin air filter out of its compartment, with an arrow indicating the direction of removal.]()
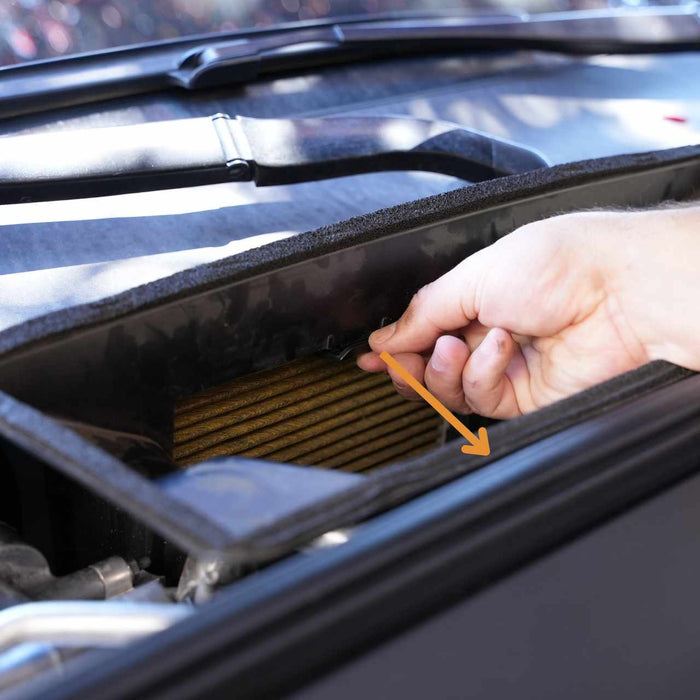
STEP 4
Use the tab to tilt the old air filter towards the front of the vehicle.
Note: 2025+ (Gen2) R1T & R1S no longer have the tilting tray with a tab. Simply tilt the filter itself out. -
![A hand pulls out an air filter from a vehicle compartment, with an arrow pointing towards the filter.]()
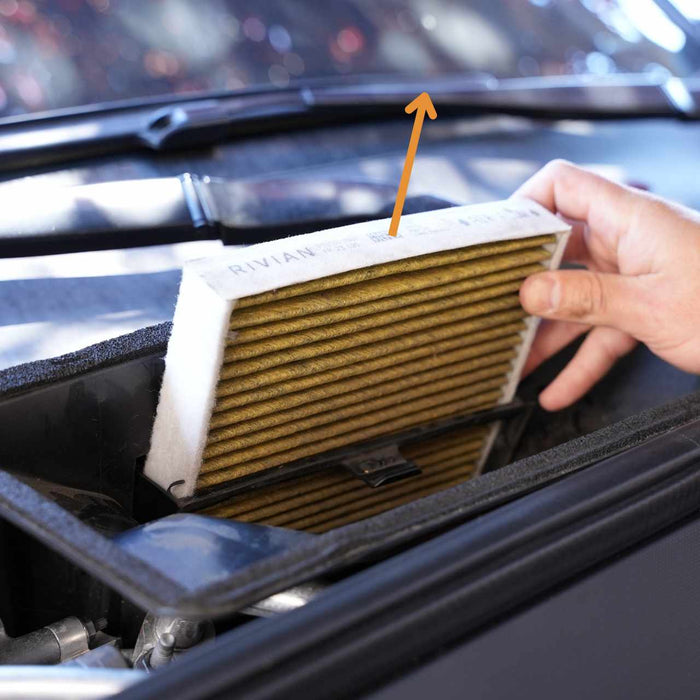
STEP 5
Remove the old filter.
-
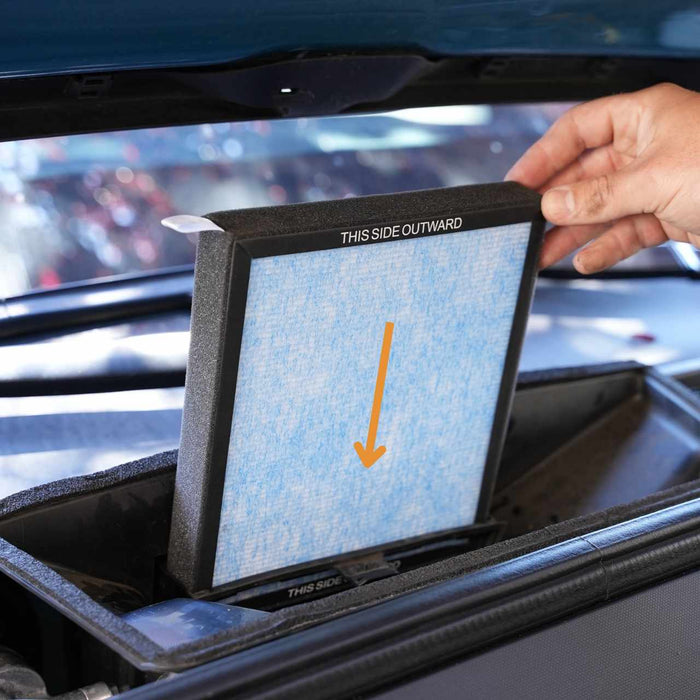
![Hand inserting a blue air filter labeled THIS SIDE OUTWARD into a cars cabin air filter compartment under the hood.]()
STEP 6
Install the new filter with the words facing forward.
-
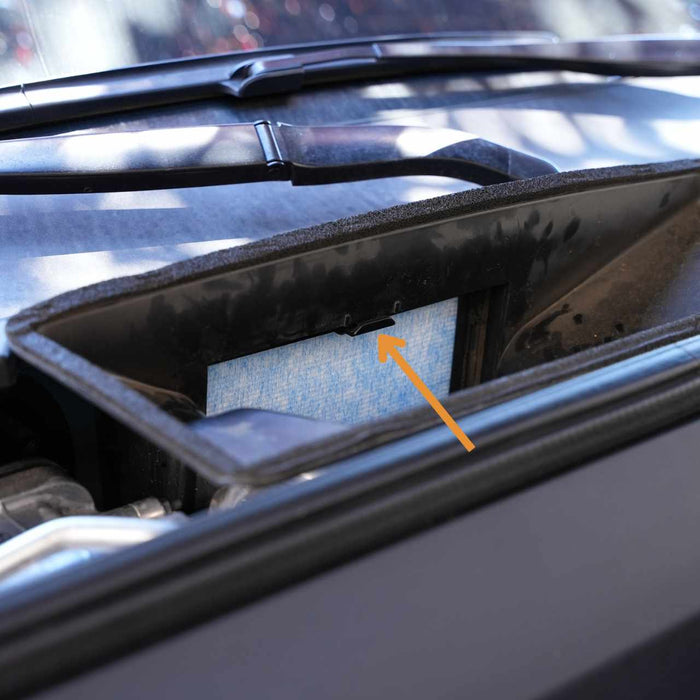
![Car engine compartment with an exposed air filter highlighted by an orange arrow. The filter is visible through an open panel near the windshield wipers.]()
STEP 7
Tilt the filter back into place.
-
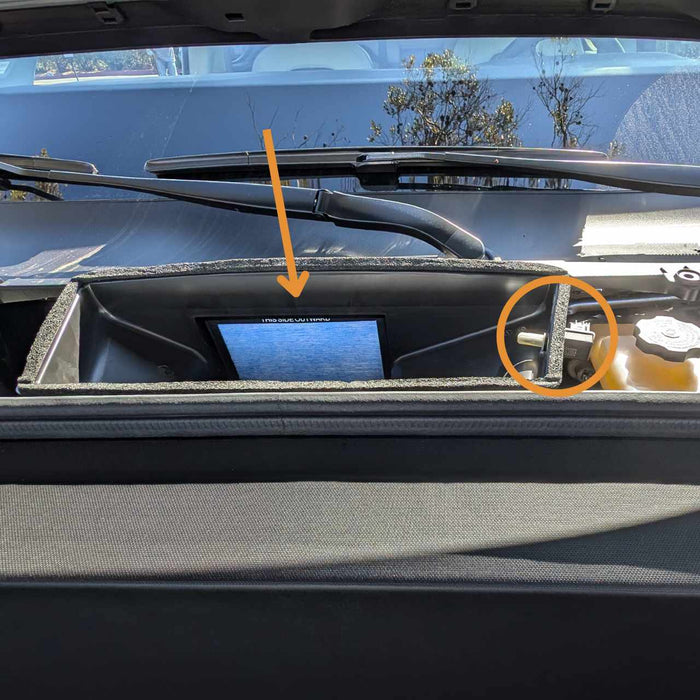
![Dashboard with a rectangular screen embedded, highlighted by an arrow. A circular element, circled in orange, is visible near the wiper blades.]()
STEP 8 (GEN2 ONLY)
While taking care to not damage the sensor, reinstall the filter housing.
-
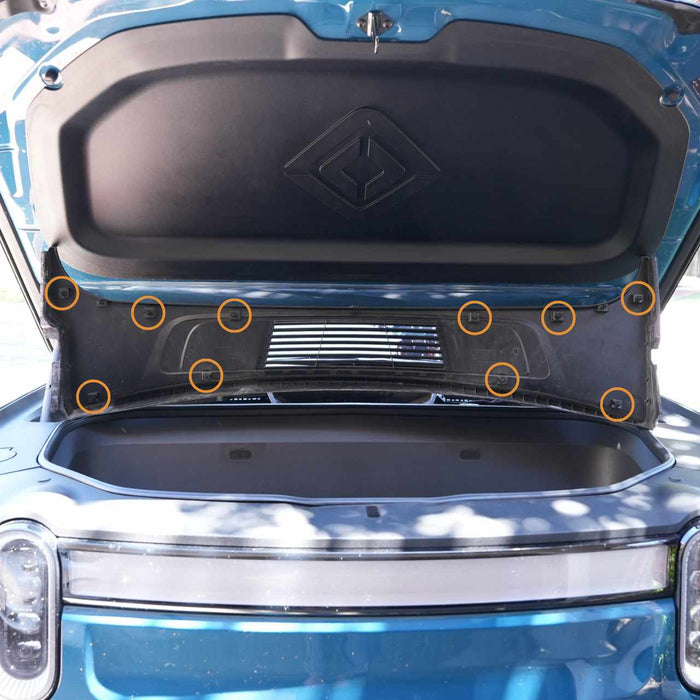
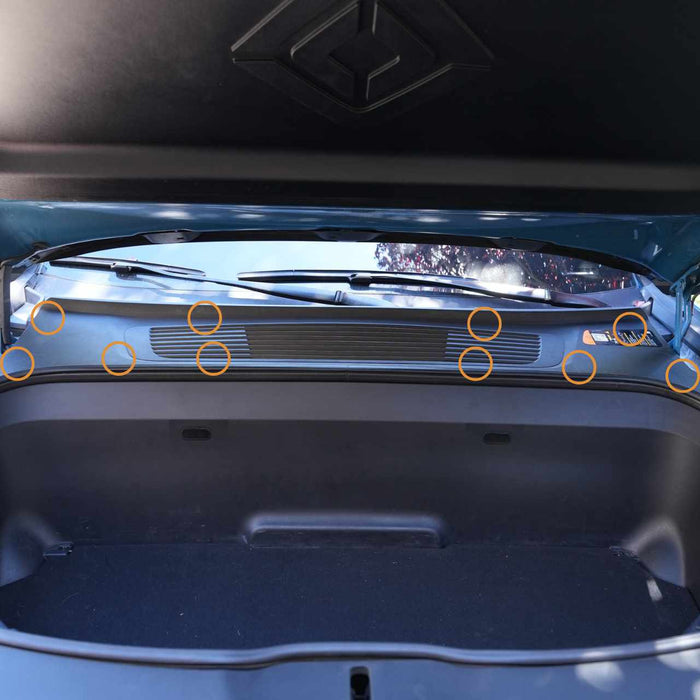
![Open front trunk of a blue vehicle showing storage space and air vents, with several circular markers indicating features or components.]()
STEP 9
Check that all ten clips are in place on the intake cover before moving it into position.
-
![Open car trunk showing an interior panel with multiple highlighted attachment points.]()
STEP 10
Press on the cover above each of the ten clips to secure the cover.


EveryAmp
| SKU:
CAFHR1TS2022
$24.00
$24.96
Why it costs less here
When you buy direct from the manufacturer, we pay lower fees and pass those savings on to you.
Low price guarantee
If you find a lower price, show us and we'll match it.
Unit price
/
Unavailable
Shipping calculated at checkout.
HEPA+Activated Carbon Cabin Air Filter for Rivian R1T & R1S is backordered and will ship as soon as it is back in stock.