While it's not as high quality and feature rich as a dedicated dash cam, TeslaCam and Sentry Mode are included with all Teslas with Autopilot hardware since August 2017 and they're certainly convenient and infinitely better than no dash cam at all. They also have the benefit of using four camera views at the same time.

So first off, what is TeslaCam anyway?
It's Tesla's name for their dash cam feature that:
- records a 60-minute video loop while the car is turned on
- records video from the front camera, side cameras, and rear camera
- overwrites the video unless you save the most recent 10-minute clip by tapping on the icon on the screen
So what is Sentry Mode then?
It's Tesla's security camera feature that:
- records 10-minute clips while the car is turned off
- activates when the car is parked and the cameras sense motion around the car
- records video from the front camera, side cameras, and rear camera
- saves 10-minute clips which aren't overwritten until the storage drive fills up
- if Sentry is activated when you're away, you'll find the number of Sentry events that were recorded in a message on the screen when you get back:

To use TeslaCam and Sentry mode, you'll need to know:
- Which flash drive to use
- How to prepare it
- How to connect it to the car
- How to enable it
- How to view the videos
Since each step depends on what kind of device you use, check out the specific instructions for your device as we go along.
Step 1: Purchase Your Hardware
You can use nearly any flash drive and it will probably work (for a while anyway), but dash cams are notorious for destroying lesser memory. In fact, many flash drive warranties specifically exclude dash cam use! The more reliable cards use a type of memory called MLC memory, rather than the less-expensive TLC memory typically used, and some of those cards are made especially for dash cams which use microSD cards. TeslaCam video may be essential to prove who is at fault in an accident or to identify a vandal, so reliability is critical and you might not know it's failed until it's too late.
The best microSD card available for dash cam use right now is the Sandisk Max Endurance (paid link).

It is rated for up to 60,000 hours (almost 7 years!) of video recording - impressive for sure and ideal if you're using Sentry Mode in an area where it records frequently when you're parked.
We previously recommended (and still personally use) Samsung Pro Endurance cards (paid link). They're still at a great choice with a 43,800-hour rating and they're available for a lower cost if you want to save some money.
What size card works best?
The best size partly depends on which device you'll use to prepare it, so we'll get to that in the next step, but somewhere between 32 GB and 128 GB will meet most people's needs. Every hour of footage needs about 10 GB of storage. TeslaCam saves a 1-hr loop of video, so 32 GB gives you enough space for the TeslaCam loop plus 2 hours of saved clips and Sentry Mode video. If you step up to 128 GB, that gets you 13 hours of video which will likely take months to fill up if Sentry is only activated a few times each day. You could go even larger (paid link), but we don't think it's necessary.
But the car doesn't have a microSD card slot right?
Since most devices, including the car, need some type of adapter to work with microSD cards, we have our recommendations for that as well. For the next steps, select the device you'll be using for our top picks.
What about solid state drives/SSDs?
Most SSDs use the less-reliable TLC memory, but they also usually have more sophisticated memory controllers that make them more reliable than flash drives. They can work well with TeslaCam, but they have the downside of needing external power to be used with iPhones and that's one more step than we care to do when there's no significant benefits.
What about flash drives or the Sandisk iExpand or Connect sticks?
None of these options use high-endurance memory, so they don't meet our minimum requirements for reliability.
What about Roadie?
Don't get us wrong, the Roadie is cool and adds cool features, but we prefer simplicity and reliability when a failure can have big consequences.
Apple iPhones
For iPhones, you’ll want a 128GB microSD with a dual USB and USB-C card reader that will let you connect to the car and also to a computer to prepare the card in Step 2. You’ll also need a Lightning to microSD adapter to view the videos on your iPhone.

This setup lets you move the microSD card from the USB adapter to the Lightning adapter to let you view the files directly with the files app in iOS, which makes it compatible with the apps we recommend below. Not all Lightning to USB or microSD readers out there work with the files app in iOS 13+, so be careful with your choice.
Android Phones
For Android phones, you’ll want a 128GB microSD card with a dual USB and USB-C card reader that will let you connect to the car and to a phone with one device. Android really has the easiest experience right now.

Apple MacOS
For MacOS, you’ll want a 128GB microSD with a dual USB and USB-C card reader that will let you connect to the car and to a computer with one device.

Windows Computers
For Windows Computers, you’ll want a 32GB microSD with a dual USB and USB-C card reader that will let you connect to the car and to a computer with one device. We recommend 32GB here because Windows’ built-in formatting tool doesn’t support FAT32 if the drive is larger than 32GB. If you’re up for it, a third-party formatting tool will let you go larger.

Step 2: Prepare Your Flash Drive
For the car to recognize it, the microSD card needs to be formatted in FAT32 with a folder named "TeslaCam" in the root. If that sounds like a foreign language to you, no worries, just read on and we'll help.
As of software version 2020.16.2, Tesla now has a tool to format flash drives for us! Select Tesla below to see how to prepare the drive in the car.
Tesla
The Tesla interface is limited and picky, so things need to be just right for it to work.
- Disconnect all of your USB devices in the car, so when you connect your TeslaCam drive, it will be the only option
- Insert your microSD card into the card reader
- Connect the USB-A end of the card reader to the USB-A port in the car
- Tap on Controls
- Tap on Safety and Security
- Tap on Format USB Device
- Tap Format
Apple iPhones
Unfortunately, iPhones aren’t currently able to format external storage so you’ll need to perform this step on another device.
Android Phones
Android phones are often customized by manufacturers, so yours may vary a bit, but the steps should be close:
1. Insert your microSD card into your card reader
2. Connect your card reader to your phone
3. Open your file manager app of choice (stock Android Files app is shown in center)

4. Select your microSD card from the left menu (yours may be named differently)

5. Select storage settings from the right menu

6. Tap Format

7. Tap FORMAT USB DRIVE

8. Tap Done

9. Select your microSD card from the left menu again

10. Tap New Folder from the right menu

11. Type “TeslaCam” as the name (make sure it’s all one word with a capital T and C)

12. Tap the Eject icon in the left menu before you remove the drive

1. Insert your microSD card into your card reader
2. Connect your card reader to your computer using USB or USB-C
3. Open the Disk Utility app
4. Select your USB drive (labeled NO NAME in this example, yours may be different)

5. Select the Erase button at the top of the window
6. Type in TESLACAM
7. Choose MS-DOS (FAT)
8. Select Erase

9. After it finishes, select Done

10. Open the Finder app
11. Select your TESLACAM drive on the left side
12. On the right side, right-click and select New Folder
13. Rename the folder TeslaCam (all one word with a capital T and C)

14. Select the Eject button before removing it from the computer
Windows Computers
1. Insert the microSD card in your USB adapter and connect to the computer.
2. Open Windows Explorer and find the flash drive (it may be called E:, F:, G:, etc).

3. At the top of the window, select Drive Tools, and Format

4. Select FAT32 for the File system, type TESLACAM as the Volume label, and select Start

5. Select OK

6. After it completes, select OK

7. Back in Windows Explorer, select the TESLACAM drive, then the Home button at the top, and then New folder

8. Type in TeslaCam (all one word with a captial T and C)

9. At the top of the window, select Drive Tools, then Eject

10. Remove your TeslaCam drive from the computer
Step 3: Connect to Your Car
This part should be easy, but there's one catch - the car only comes with two front USB ports and they're probably both taken by phones in the charging dock. If you want to be able to use TeslaCam, charge two phones, maybe connect a gamepad for Tesla arcade games, and use a second USB flash drive for music all at the same time, you're going to need more ports. Here's what we suggest.
To connect 2 devices
Nothing additional needed!
- Connect your TeslaCam drive to one front USB port
- Connect anything else to the other front USB port
- Swap cables and devices as needed
To connect 4 devices
This 3-port USB hub is compact and works great to add additional low-power USB ports.
- Connect the USB hub to one front USB port
- Connect your TeslaCam drive to the hub
- Connect other low-power devices to the hub
- Connect one phone to the remaining front USB port for faster charging
To connect 5 devices
With this many devices, it’s time to step up to a USB hub. This one has three USB-A and two USB-C ports to connect up to five devices at the same time. It also keeps everything nice and tidy and looks like an integrated part of the car.

- Connect your TeslaCam drive to the hidden USB port
- Connect phones to the two USB-A ports on the front
- Connect other devices like a wireless gamepad or music drive to the USB-C ports on the front (check out these USB-C adapters if needed)
Step 4: Enable TeslaCam and Sentry Mode
Finally an easy step where things are the same for everyone!
To enable TeslaCam, tap the icon at the top of the screen that looks like this:

To enable Sentry Mode, tap the icon at the top of the screen that looks like this:

Once you enable them, they will add three folders inside the TeslaCam folder you created in Step 2:
- RecentClips - where you'll find the 60-minute loop of dashcam video
- SavedClips - where you'll find 10-minute clips of saved video if you tap the icon on the screen
- SentryClips - where you'll find clips of video captured when you were parked
Step 5: View Your Videos
As of software version 2020.12.5, we can now view our videos in the car! The interface is great for checking the footage, but there's still no way to download or share the videos, so most people will still want to use their phones in some situations. This is especially helpful if you're in an accident or have been the victim of vandalism and need to review the footage with the police. Here's how to view the files on each device.
Apple iPhones
- On your car’s screen, tap and hold the TeslaCam icon until it flashes and wait a few seconds for it to stop recording.
- Unplug your TeslaCam drive from the car
- Remove the microSD card from your USB adapter and move it to your Lightning adapter
- Connect your Lightning adapter to your phone
- Open your app of choice to view the files. These two work well:

Android Phones
- On your car’s screen, tap and hold the TeslaCam icon until it flashes and wait a few seconds for it to stop recording.
- Unplug your TeslaCam drive from the car
- Connect the USB-C port on your card reader to your phone
- Open your app of choice to view the files. We like this one:
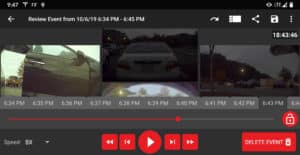
Check out our demo of the app and setup.
Apple MacOS
- On your car’s screen, tap and hold the TeslaCam icon until it flashes and wait a few seconds for it to stop recording.
- Unplug your TeslaCam drive from the car
- Connect your card reader to your computer with the USB or USB-C port
- Open your app of choice to view the files. We like this one since it’s free and web-based:
Windows Computers
- On your car’s screen, tap and hold the TeslaCam icon until it flashes and wait a few seconds for it to stop recording.
- Unplug your TeslaCam drive
- Connect your card reader to your computer with the USB or USB-C port
- Open your app of choice to view the files. We like this one since it’s free and web-based:
That's it!
Hopefully you'll never need the footage because of an accident or vandalism, but at least it's there if you do.


