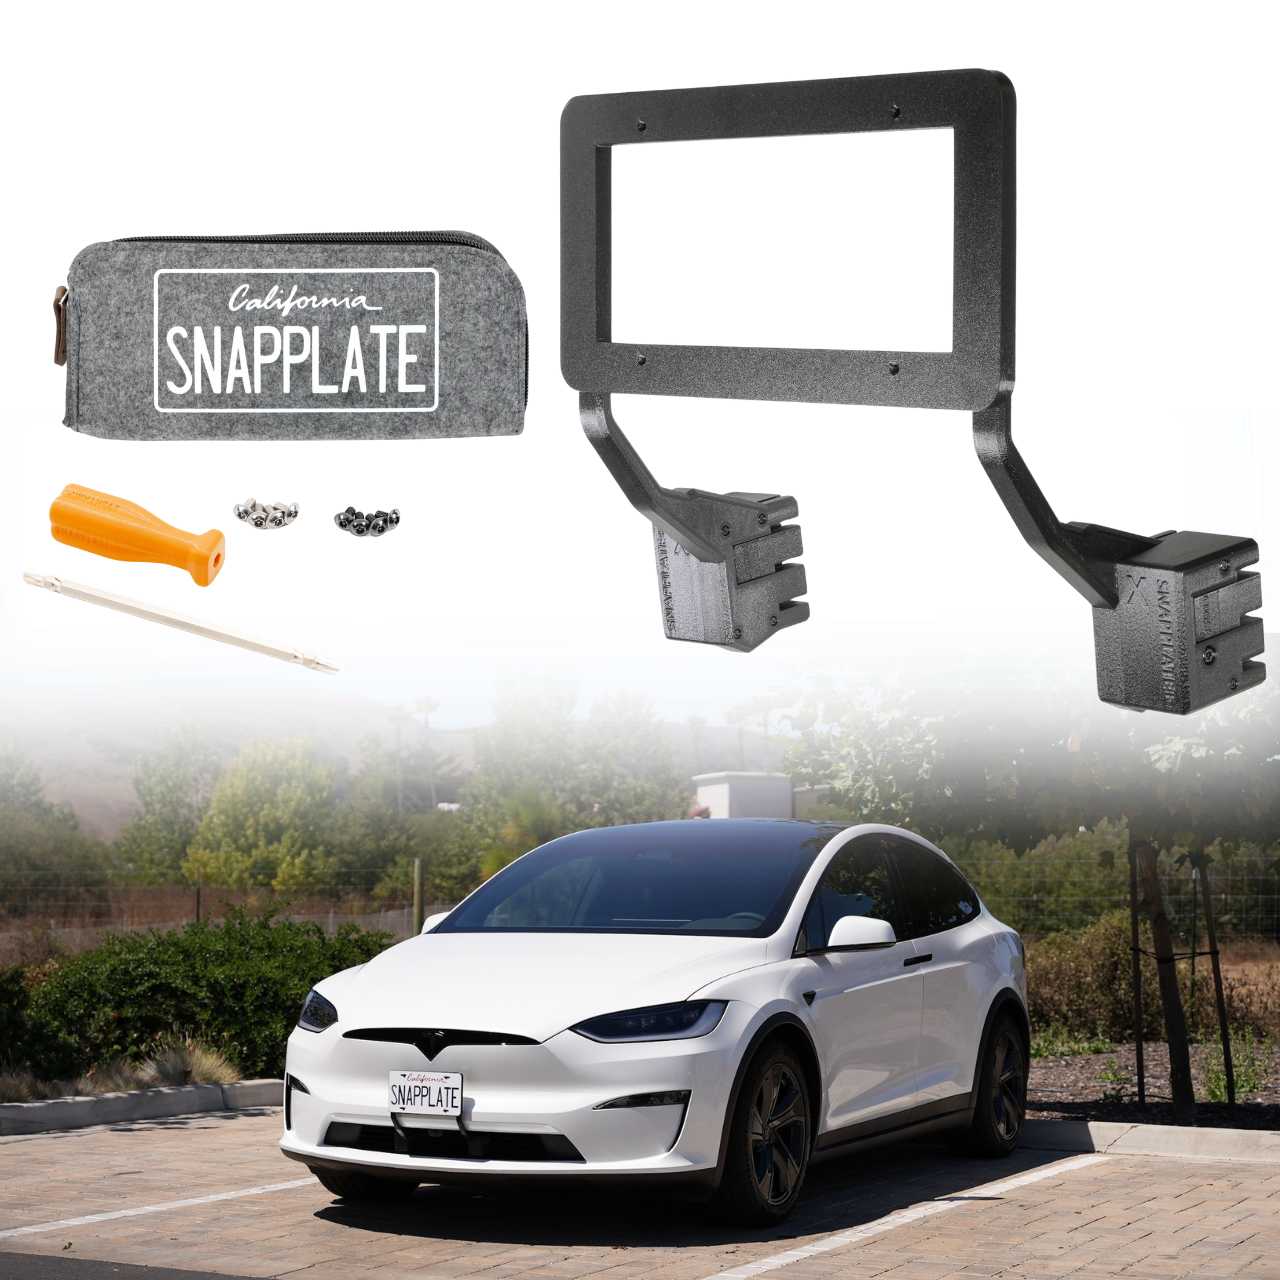
Follow the steps below to install and adjust a SnapPlate+ front license plate mount on a 2026-Oct 2021 Tesla Model X or 2026 Tesla Model S Base or Plaid with a bumper camera. We're here to help if you have questions or get stuck!
2026-Oct 2021 Tesla Model X and 2026 Model S SnapPlate+ Instruction Guide
Installation Steps ➥
-
![SnapPlate T10/T25 Screwdriver]()
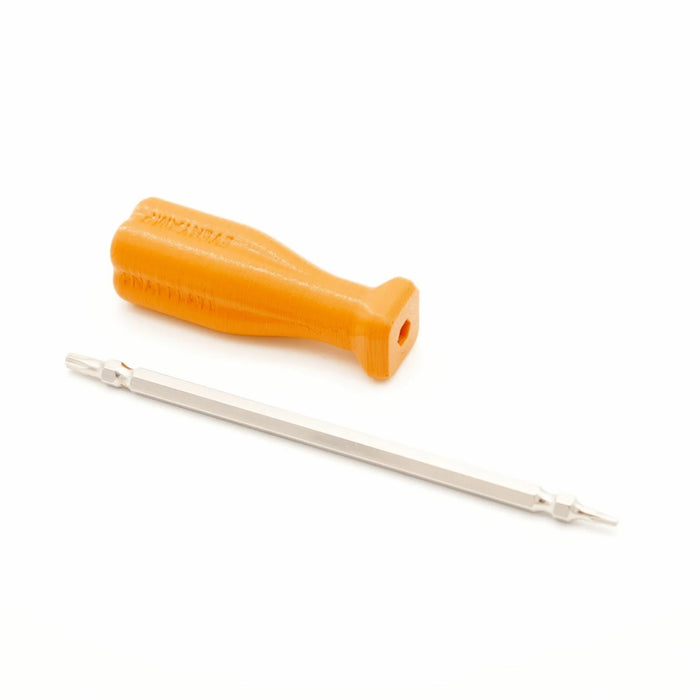
Step 1
Remove the T10/T25 bit from the screwdriver handle and reinstall with the larger T25 bit facing out.
-
![]()
Step 2
Locate the larger, black and silver washer-head screws and the smaller, round head screws in your hardware kit.
-
![An orange-handled screwdriver is inserted into a screw on a license plate that reads SNAPPLATE, which is attached to a black mounting bracket.]()
Step 3
Install your license plate on the plate mount using four of the included black or silver larger, washer-head torx security screws.
Note: Make sure the SNAPPLATE logo on the top of the plate mount and the license plate are both right side up. -
![]()
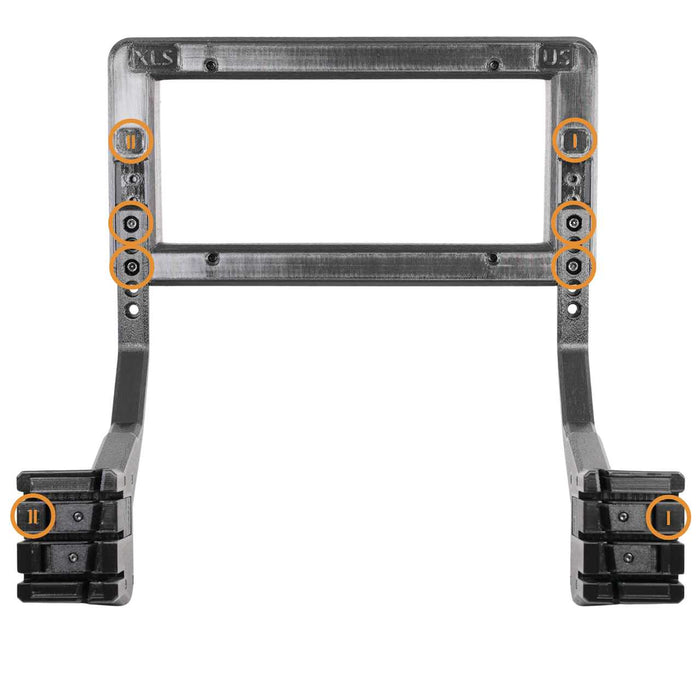
Step 4
Position the base with the I marker on the side of the plate mount with the I marker and the base with the II marker on the side of the plate mount with the II marker.
-
![]()
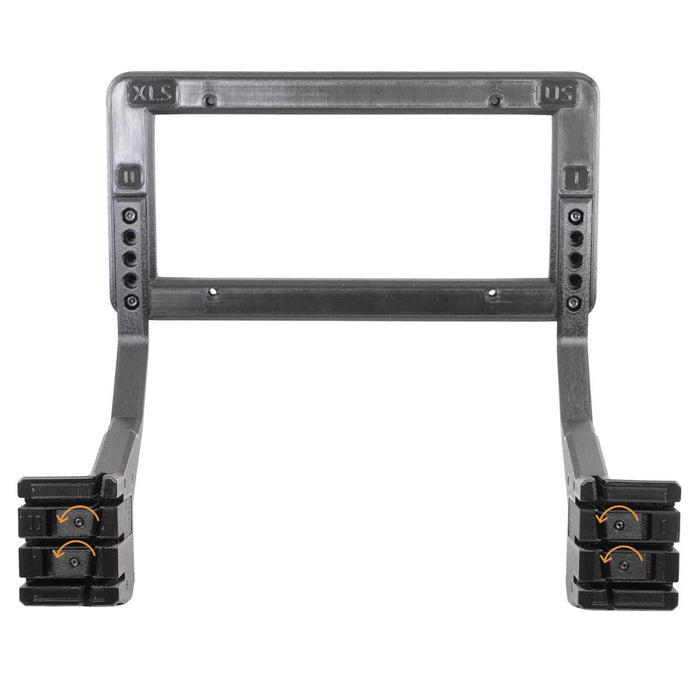
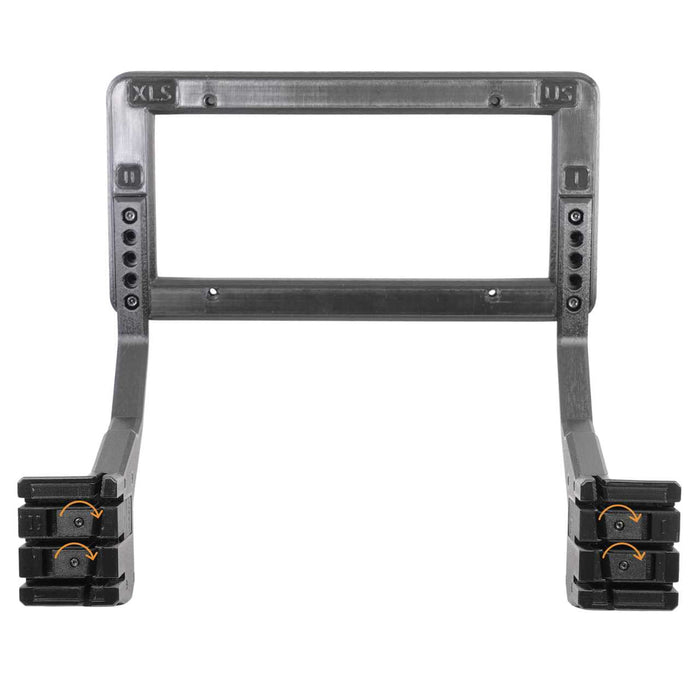
Step 5
Use the smaller, round-head black screws to attach the bases to the plate mount in the top and bottom holes.
Note: If the screws seem to be too short or don't fit in the holes, you're likely using the larger, washer-head license plate screws.
Optional: The plate mount can be adjusted higher by sliding the plate mount up by 1, 2, or 3 holes and installing the screws at the farthest available holes. See the plate height adjustment instructions for details. 👇 -
![A hand removes a license plate mount from a vehicle; two black brackets labeled OPEN are shown with orange arrows indicating the direction to release.]()
Step 6
Align the vertical openings in the bases with the vertical bars in the grille and slide the SnapPlate into the grille.
Note: You can press the OPEN buttons while installing the SnapPlate or just push it onto the grille. The OPEN buttons will move on their own. -
![A California license plate reading SNAPPLATE is mounted on a white vehicle with black brackets labeled SNAPPLATE and yellow arrows indicating CLOSE.]()
Step 7
Push both CLOSE buttons to secure the SnapPlate on the grille.
Important! There should be some resistance, but the buttons should not be difficult to push. If they're too difficult, adjust the depth following the grille depth adjustment instructions. 👇 -
![Close-up of a black SnapPlate mount attached to a vehicle grille, with an orange circle highlighting the locking tab feature.]()
Step 8
Make sure both CLOSE buttons are flush with the SnapPlate bodies to ensure they are locked in place with the magnets engaged.
-
![A hand uses a screwdriver to loosen a screw on a black rectangular device labeled SWAPAIRPLATE attached to the front of a white vehicle.]()
Step 9
Optionally, tighten the black anti-theft security screws in the holes on both sides.
Note: It should take ~8 full turns to lock or unlock the screws. They do not need to be fully removed. -
![A California license plate reading SNAPPLATE is mounted on a car with two brackets labeled OPEN and arrows indicating the direction to open them.]()
Step 10
Don't forget to remove SnapPlates for automated car washes. Most touchless washes are fine, but better to be on the safe side!


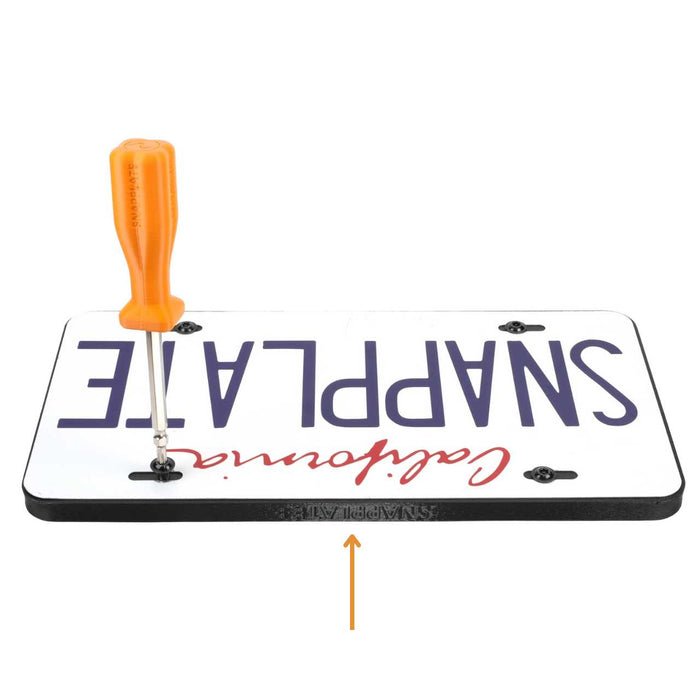


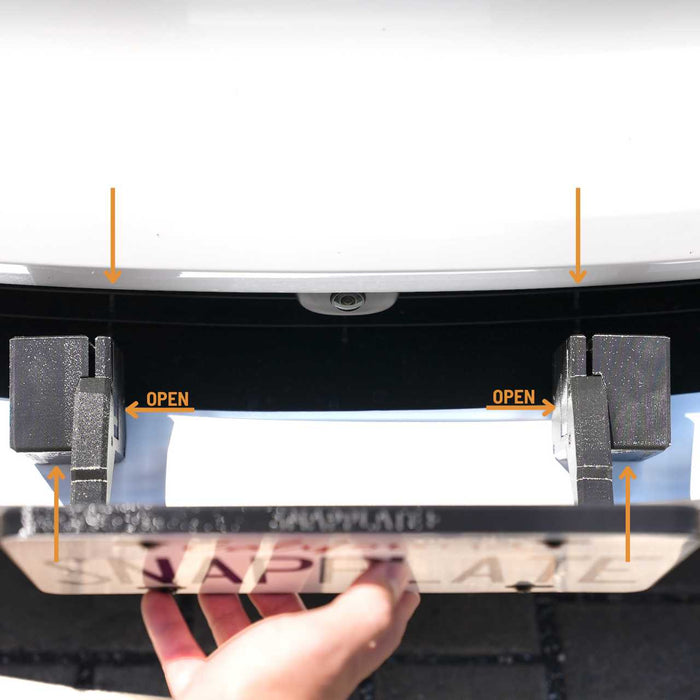
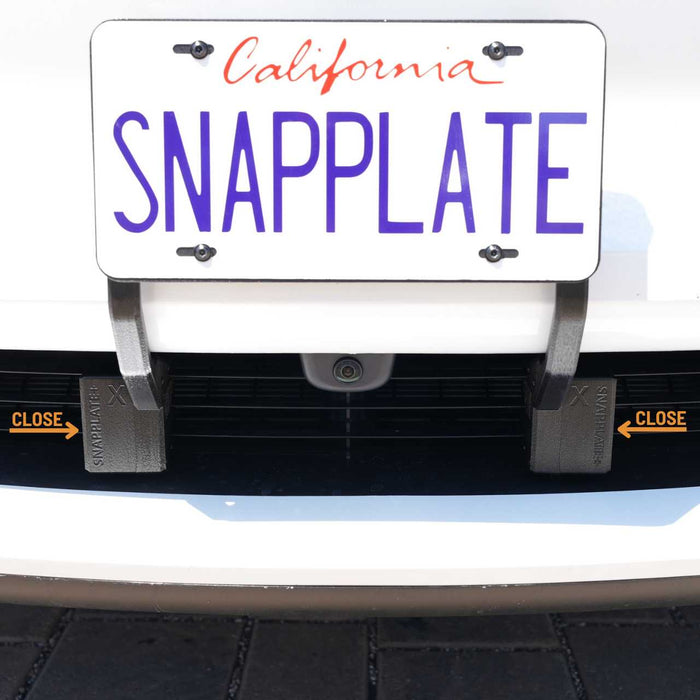
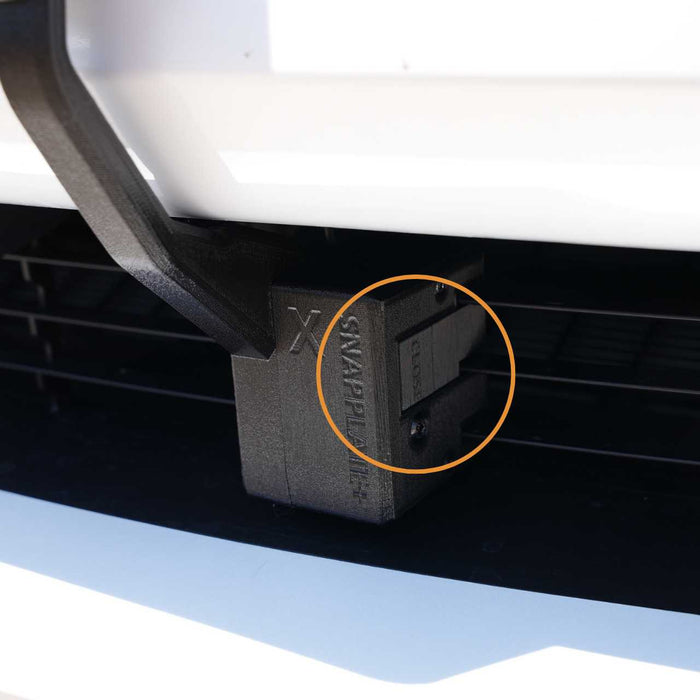
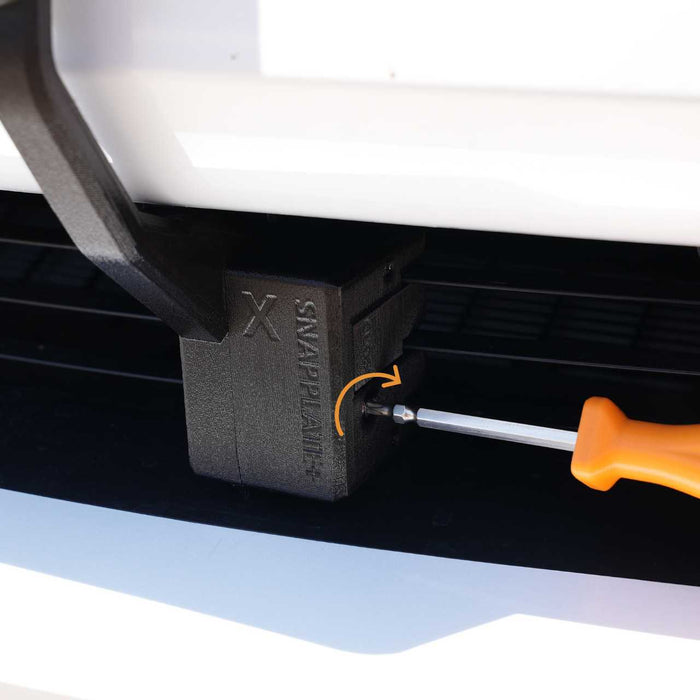
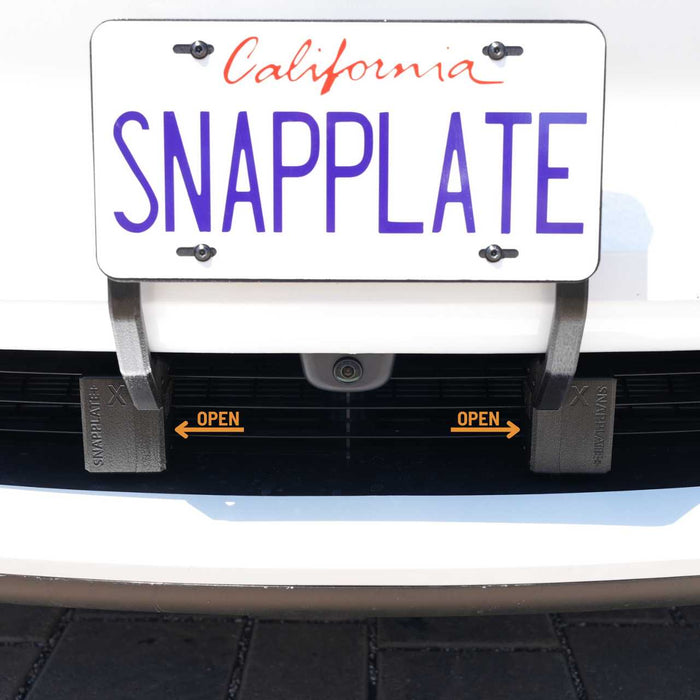
Plate Height Adjustment Steps ➥
-
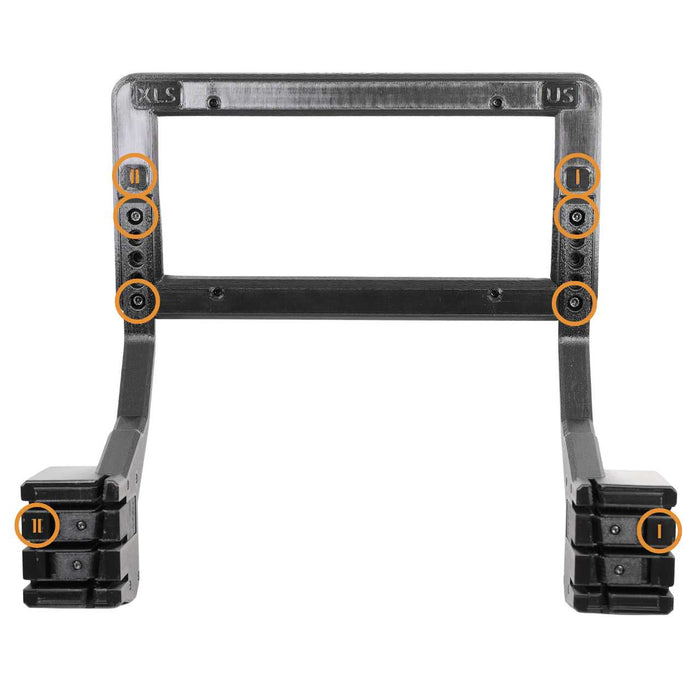
![Black rectangular plastic frame with two lower arms, showing eight highlighted screw holes marked with orange circles.]()
Step 1 (Low)
For the low position, install the bases with the four screws as marked.
-
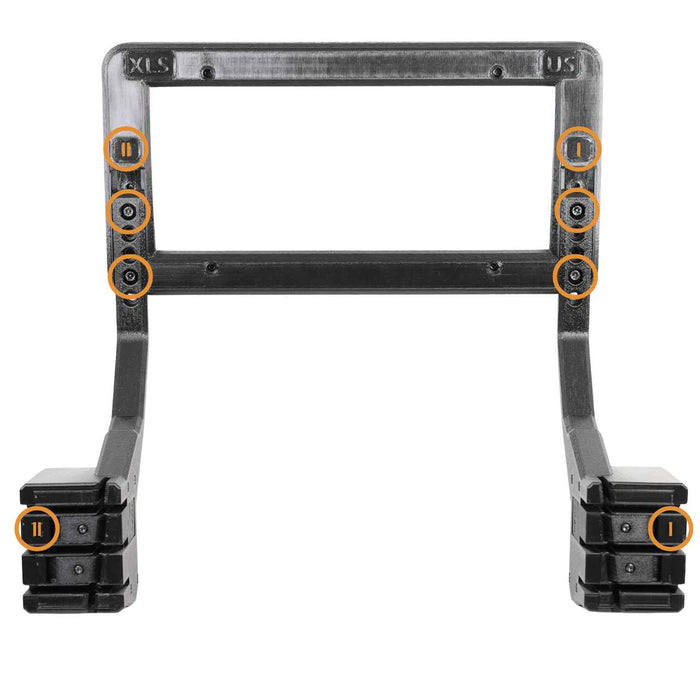
![Black rectangular plastic bracket with six screws and six marked areas highlighted in orange circles. The bracket has two protruding arms at the bottom with additional highlighted sections.]()
Step 2 (Center)
For the center position, install the bases with the four screws as marked.
-
![A black plastic mounting bracket with multiple screw holes highlighted by orange circles. The bracket has two angled arms and a rectangular frame at the top.]()
Step 3 (High)
For the high position, install the bases with the four screws as marked.
Grille Depth Adjustment Steps ➥
-
![Orange screwdriver handle and a double-ended metal screwdriver bit placed on a white background.]()
Step 1
Remove the T10/T25 bit from the screwdriver handle and reinstall with the smaller T10 bit facing out.
-
![A black, rectangular plastic mounting bracket with two arms extending downward, each ending in a clamp with two orange-highlighted circular features.]()
Step 2
Locate the T10 torx screws in the center of each sliding latch.
- Go to Step 3 to loosen latches
- Go to Step 4 to tighten latches
-
![Black plastic adjustable frame bracket with multiple holes and reinforced ends, likely designed for mounting or holding equipment or devices.]()
Step 3
Turn each screw counterclockwise (lefty loosey) 1/2 turn to loosen the latches by 0.25mm. Pull each latch with your fingers to make sure they are extended and then try the fit on the grille.
Repeat up to four times (two full turns) as needed.
Important! Contact support before proceeding past two turns. Something unusual is going on. -
![A black plastic rectangular frame with adjustable arms and clamps, likely used as a mounting bracket or holder for a device or equipment.]()
Step 4
Turn each screw clockwise (righty tighty) 1/2 turn to tighten the latches by 0.25mm and try the fit on the grille.
Repeat as needed.


Loading...
EveryAmp
| SKU:
SPPMX2026US
$140.00
$154.97
Why it costs less here
When you buy direct from the manufacturer, we pay lower fees and pass those savings on to you.
Low price guarantee
If you find a lower price, show us and we'll match it.
Unit price
/
Coming Soon
Shipping calculated at checkout.
Tesla Model X SnapPlate Front License Plate Holder - 2026-Oct 2021 / Strength-Optimized (SnapPlate+) is backordered and will ship as soon as it is back in stock.


Loading...
EveryAmp
| SKU:
SPPMS2026US
$140.00
Why it costs less here
When you buy direct from the manufacturer, we pay lower fees and pass those savings on to you.
Low price guarantee
If you find a lower price, show us and we'll match it.
Unit price
/
Coming Soon
Shipping calculated at checkout.
Tesla Model S SnapPlate Front License Plate Holder - 2026 Base / Strength-Optimized (SnapPlate+) is backordered and will ship as soon as it is back in stock.